
In the second part of the VSTax guide, we have now focused intensively on all income — including real estate and securities — and it’s time to indicate deductible expenses too. Some of these have now been taken over from previous forms, and a few more still need to be indicated here.
Step 12: Interest expense (and mortgages)
In this step, you must enter all interest expenses, including mortgage interest. To do this, select the appropriate form, in which not only the interest, but also the associated debts and mortgage are entered.
Note that on page 3 of the form, only the deductions are displayed. However, the actual entry of the relevant amounts already takes place at this stage, so that all the necessary information is entered correctly and completely.
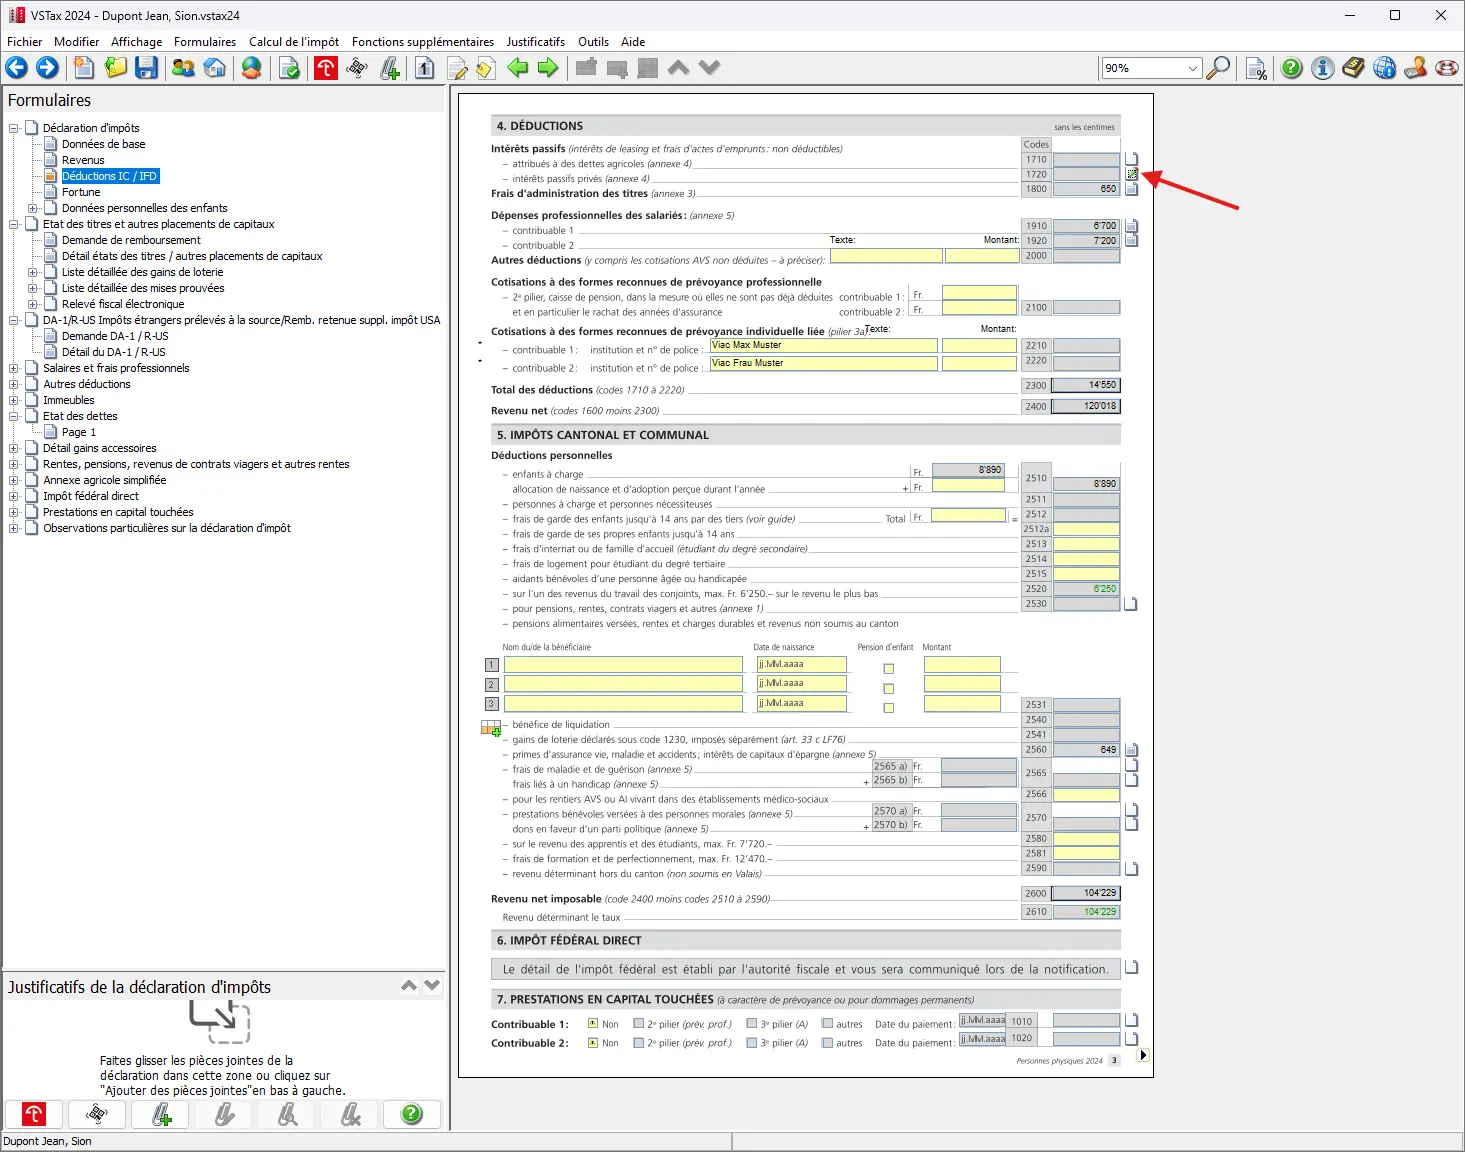
In our case, we assume that there are no consumer debts, but that only our mortgage should be taken into account. Unlike in some other cantons, the mortgage is not treated separately in the corresponding form, but is listed with consumer credits and similar debts.
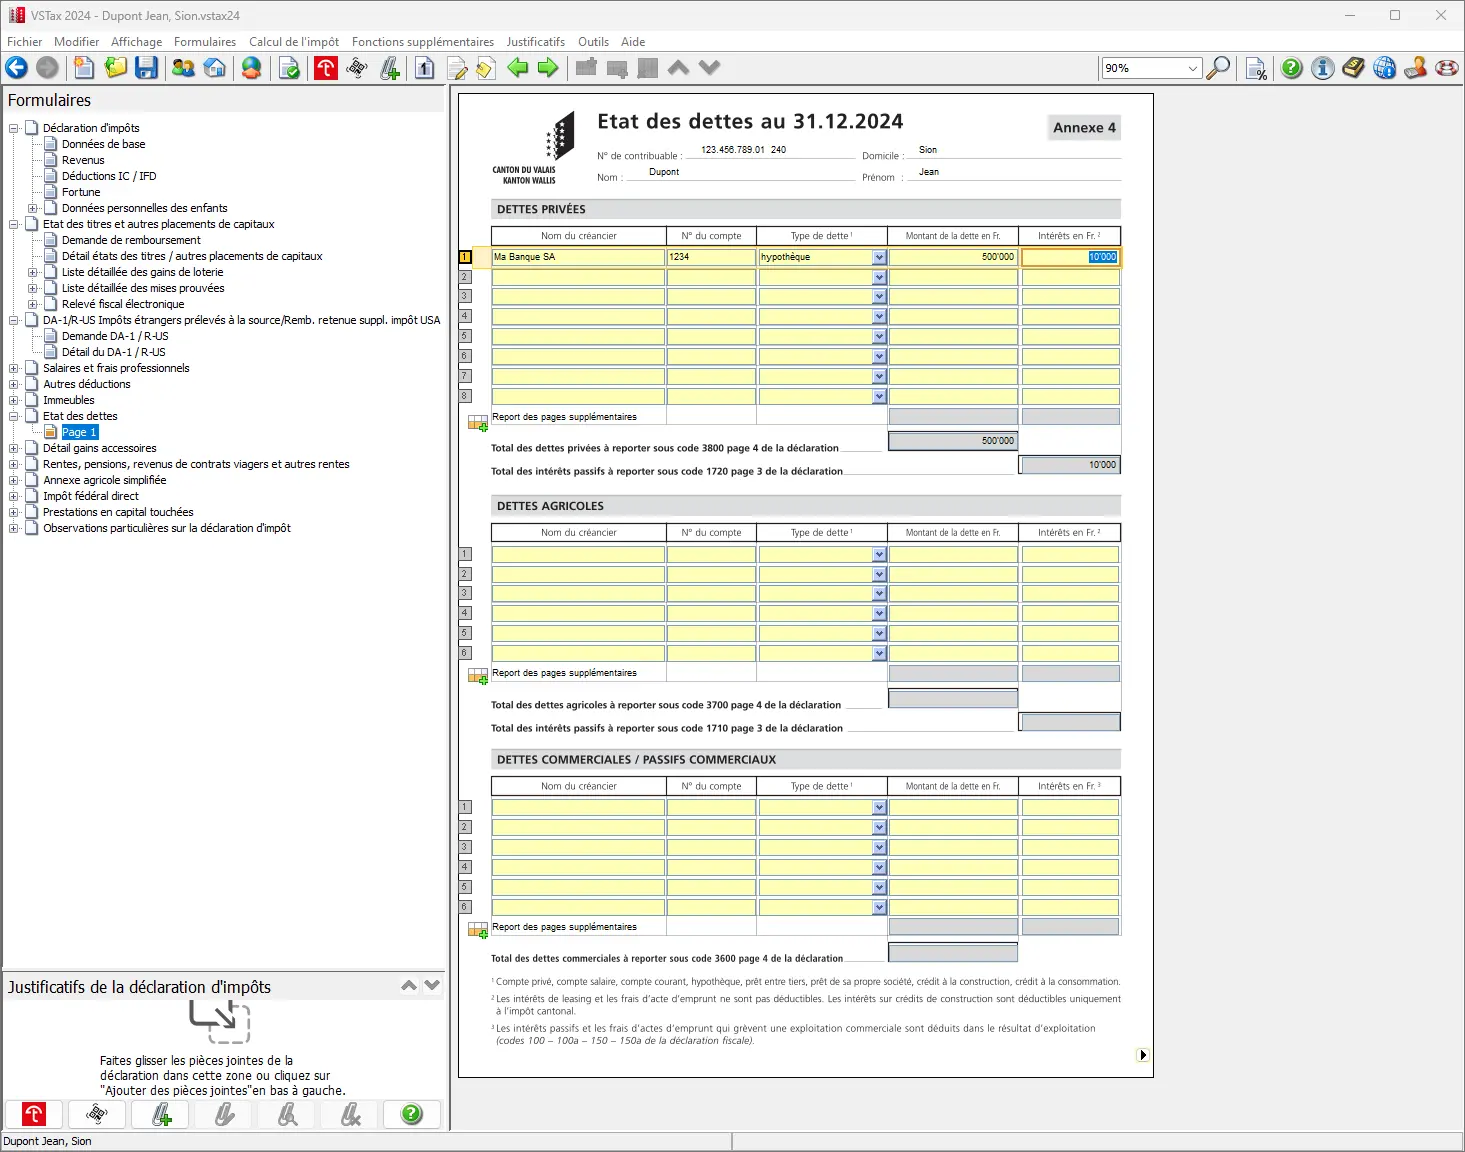
One click and the values are already included in expenses.
Step 13: Professional fees and securities management expenses
Please note that the following deductions have already been entered on the previous forms:
- Securities management expenses
- Professional expenses
By clicking next to the corresponding value, you can also return to the corresponding forms and check the values again. However, this step can now easily be skipped.
Step 14: Contributions to occupational pension plans (pillar 2) or personal pension plans (pillar 3a)
Voluntary BVG/LPP contributions (2nd pillar)
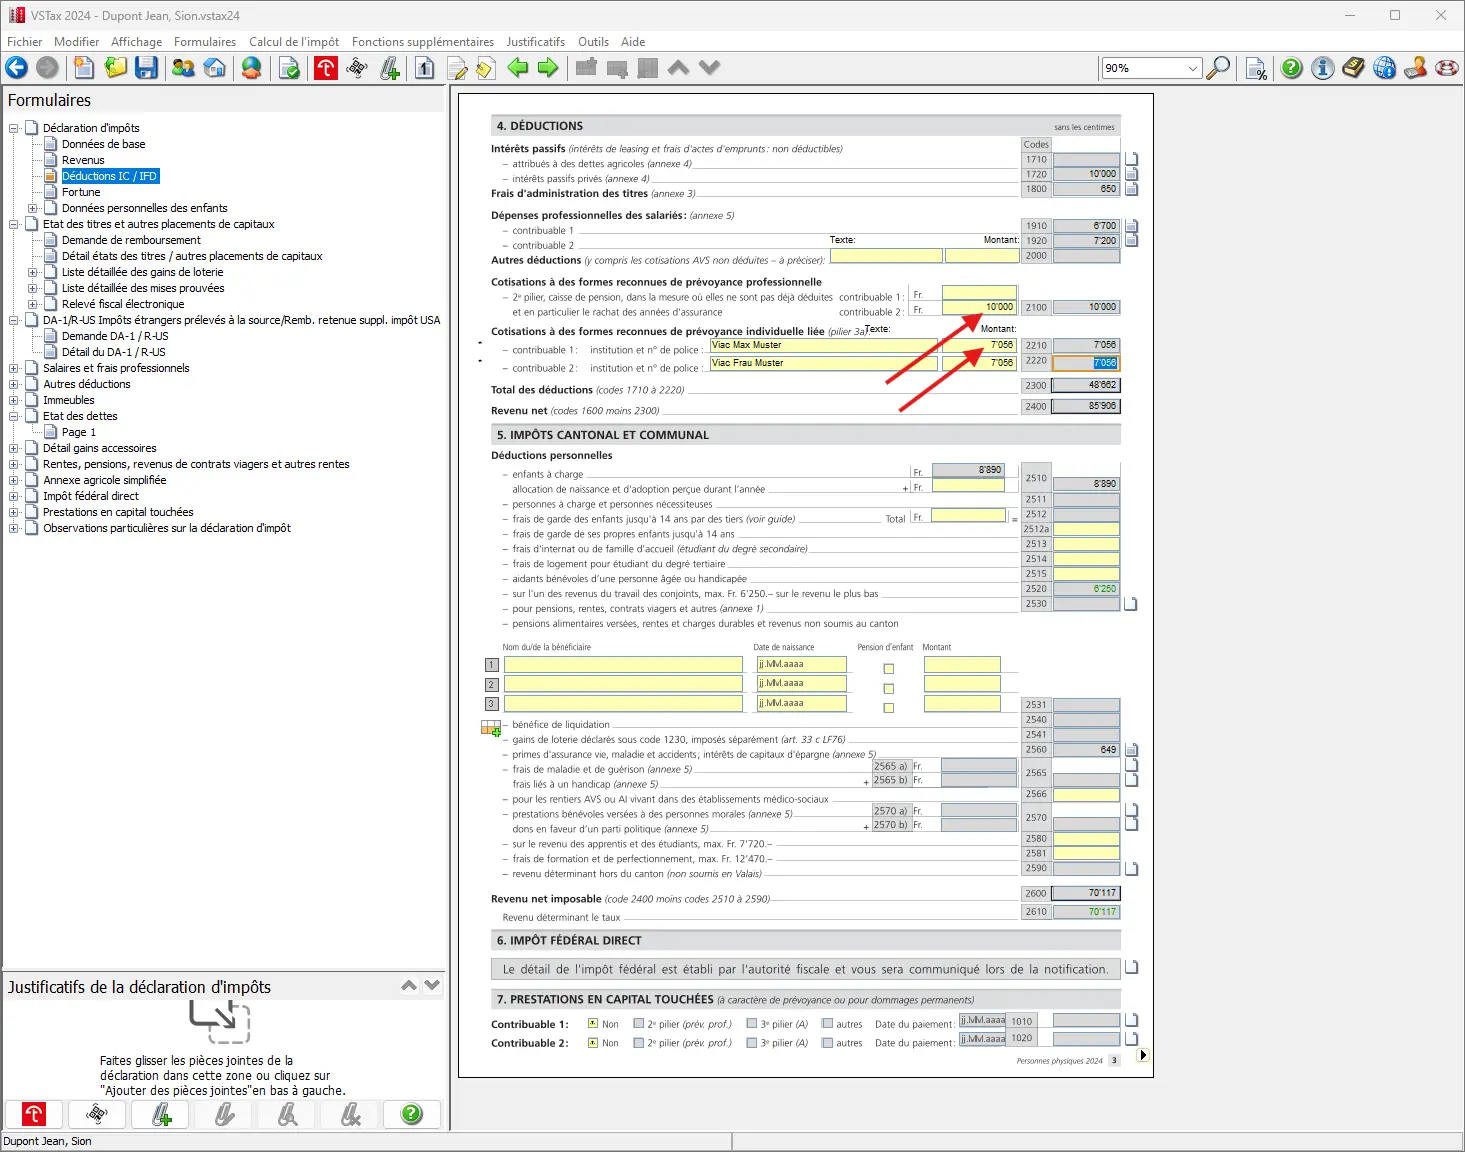
People who make voluntary contributions to occupational pension plans (BVG, also known as the 2nd pillar) can generally deduct these amounts from their income tax. Once the contribution has been made, you will usually receive a corresponding tax statement from your pension fund. The amounts indicated can then be entered in the appropriate box on the tax return — both for yourself and for your spouse, if applicable.
Pillar 3a contributions
The procedure is the same for Pillar 3a payments: these contributions can also be deducted from the tax return. This is a common and recommended practice, especially for people who work — as many readers of this blog do — in order to benefit from tax advantages while preparing for retirement.
Step 15: Personal deductions
Before submitting my tax return, I always go through the same checklist to avoid costly oversights. I detail all my Swiss tax deductions here, with concrete real-life examples:
My Swiss tax deductions: real-life example and checklist (2026)
There is now a series of deductions that are taken into account here and can be entered in the corresponding fields. Only the most important deductions are listed here, so as not to forget anything:
- Expenses for dependent children
- Third-party childcare costs (such as daycare), etc., but only up to a maximum amount that the software calculates. It’s worth taking a look at the guide to check your personal situation.
- Life, accident and health insurance premiums and contributions, and savings interest: Important: must be checked, otherwise only savings interest will be claimed.
- Medical expenses
- Donations
- Deduction from professional income of spouse earning second salary (fortunately, this is established automatically)
Particular attention should be paid to information on medical expenses and insurance premiums. A separate form is available for entering these expenses. This form can be accessed by clicking next to the corresponding field.
To illustrate the process, a few sample figures have already been entered on the form. This gives a realistic idea of what the data might look like in practice.
If everything has been entered, page 3 should now look like this:

If 2nd or 3rd pillar lump-sum benefits have been received — for example, as part of the encouragement of home ownership — it is necessary to indicate these amounts. The relevant information should be entered at the very bottom of page 3 of the form. This ensures that all capital withdrawals are duly and fully declared.

Step 16: Wealth
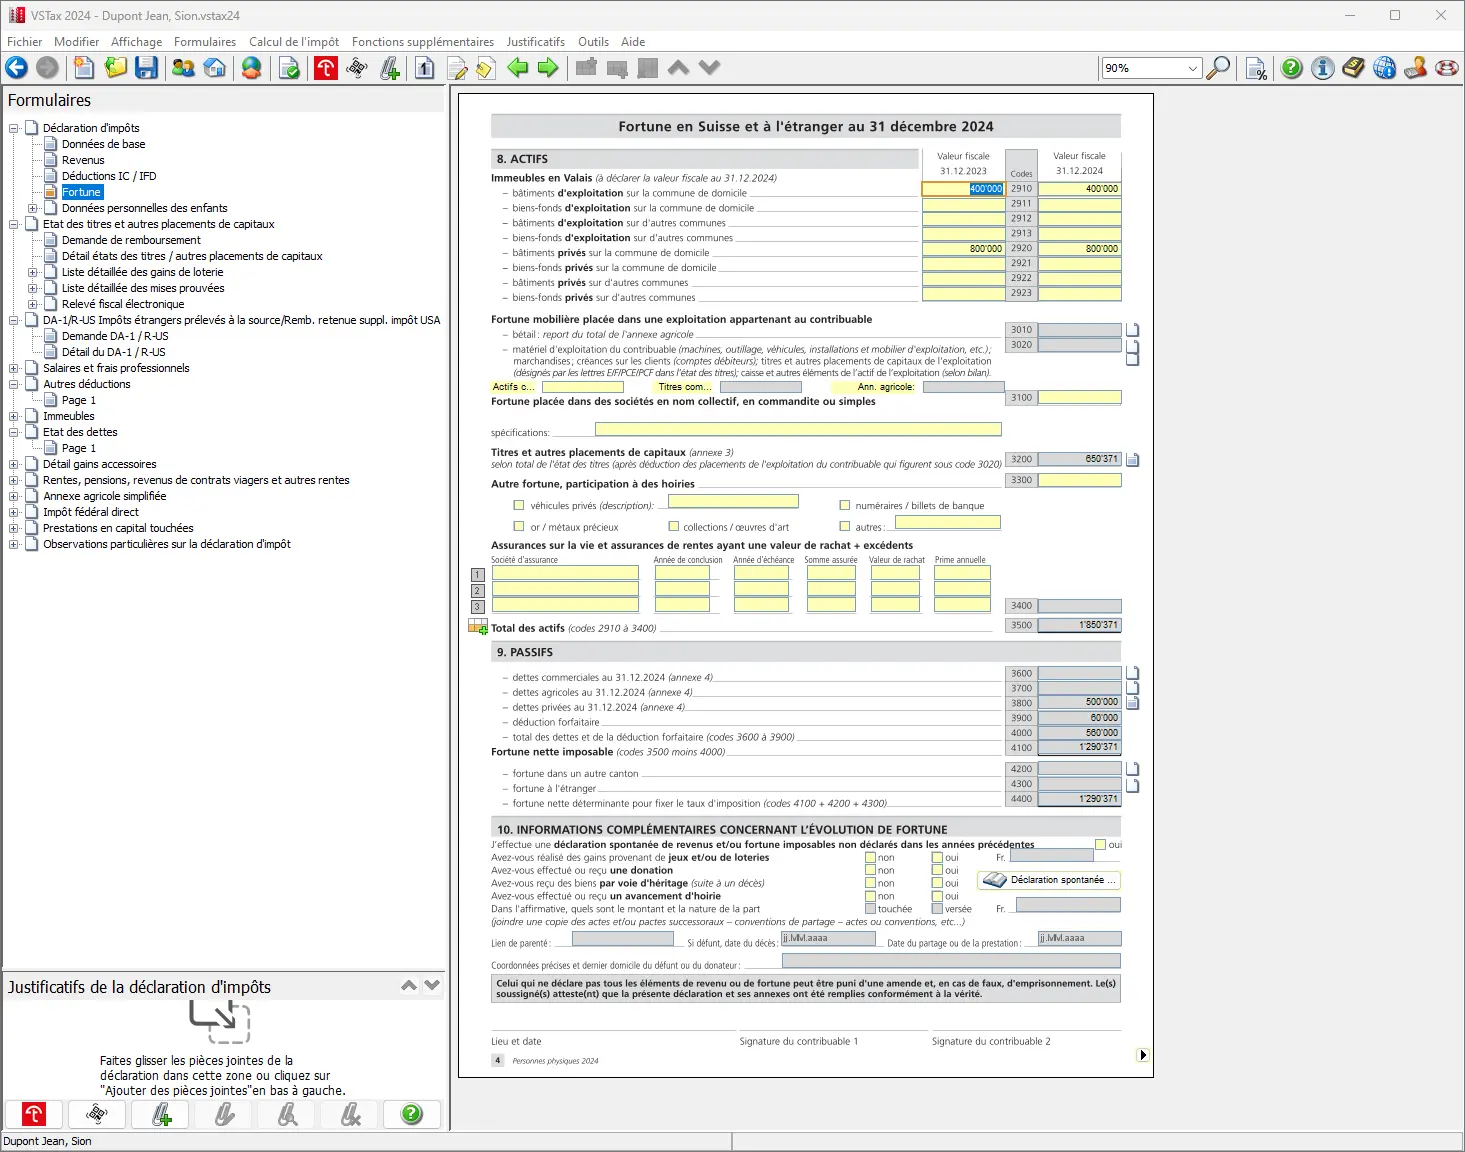
The final step in our tutorial is fairly straightforward. As securities, real estate and debts already had to be entered for income, VSTax has already entered numerous values for page 4 and automatically calculated the value of wealth.
The main purpose of page 4 is therefore to check the amounts already entered and complete the values below if necessary. This ensures that all important asset items are correctly and fully represented on the tax return:
- Vehicles
- Cash assets
- Life insurance policies and their surrender values (let’s hope they don’t exist; I’ll explain what to do if they do in this article -> “Close your pillar 3a life insurance without further delay!”)
- Possibly other values
Donations or anticipated inheritances should also be indicated on this page.
In our example, this is as follows:
Step 17: Upload receipts and close
If all the information is correct, the navigation takes you back to the first page. Filling in the tax return is then basically complete, and no further entries are necessary.
The next step is to upload all the relevant documents. You have the choice of sending the receipts in paper form with the tax return, or transmitting them electronically. I strongly recommend electronic submission, as it is both faster and more efficient.
Inserting receipts by drag & drop
As I said in the first part of this blog, uploading receipts by drag-and-drop is the most convenient method for me. I’ve had problems with the Tell Tax App, mainly because uploading was too complicated for me. But I’ll try again next year, for sure.
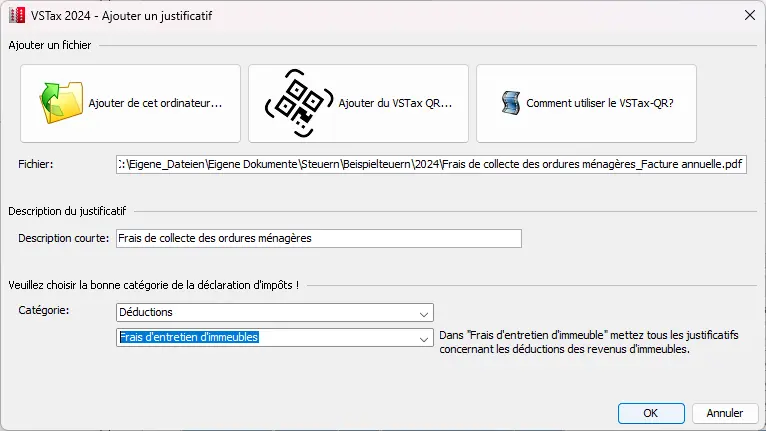
To download receipts, simply drag and drop the desired file into the field at the bottom left. Once dropped, a window opens automatically, in which the file can be assigned to an appropriate category or a specific operation. This not only simplifies the upload process, it also makes it clearer, enabling efficient allocation of receipts.
In this example, an invoice for garbage removal costs has been uploaded and assigned to maintenance costs:
Adding receipts with the Tell Tax App
To use TellTax, there’s a great introductory video to TellTax that clearly and comprehensibly explains the app and the various steps. The video is useful and makes it much easier to get to grips with the system.
If the application works as expected, the solution proves to be extremely practical and user-friendly. However, I personally found that it didn’t work for me. Unfortunately, I wasn’t able to see the benefits for myself.
Conclusion
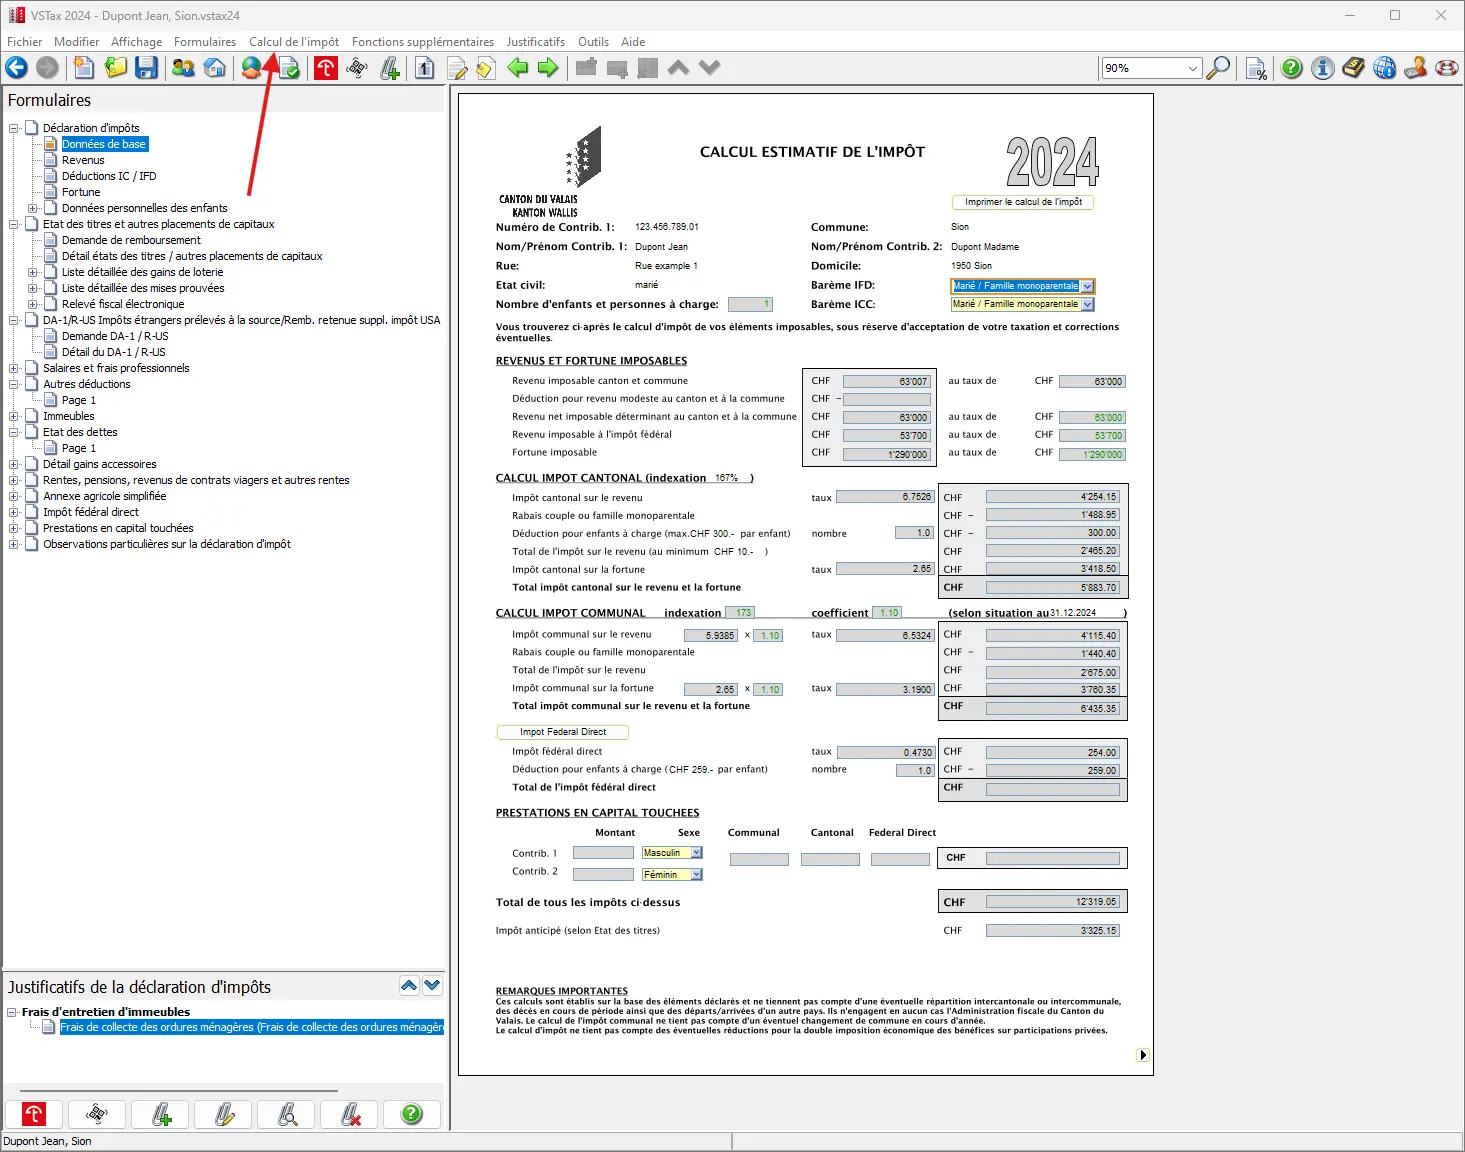
Once all the relevant documents and values have been entered, a provisional tax calculation can be made. This calculation serves to identify potential unpleasant surprises at the time of the final tax statement. It also ensures that sufficient funds have been budgeted for the expected taxes for the rest of the year.
To access the provisional tax calculation, simply click on the “Tax calculation” tab. A new page opens, on which the provisional tax calculation is performed. In this example, the calculation has been carried out for a married couple with children, and the corresponding values have been determined.
You can now send the corresponding file to the tax authorities and (if not all receipts have been uploaded) send the additional paper receipts by post.

Personal tax return home page with personal info, marital status and family expenses, plus the button marked to send the tax return
This last click starts the upload and you receive a confirmation. The tax return is now complete and can be securely saved one last time.
I hope I’ve provided you with a clear and easy-to-understand guide to filing your tax return in the canton of Valais.
And as always, if you come across any other (legal!) tax optimization ideas in the screenshots above, don’t hesitate to let me know.