After the winter and sports vacations, when many of us went skiing or snowboarding, and after Carnival, which was hopefully fun, it’s the start of a slightly quieter time of year for many. For some Valaisans, it’s even Lent. But to this atmosphere is often added another disappointment: the tax authorities remind us that it’s time to file our tax returns again.
As in many other cantons, you can push back the March 31 deadline by a few months. But in the end, you can’t escape the obligation to file your tax return. For us Mustachians, this is not a problem. On the contrary, it’s a great opportunity to look back on the past year from a financial point of view and see how we’ve progressed. With a bit of luck, you may even discover tax optimization possibilities for the coming year.
If you use VSTax, you’ll automatically receive an annual tax guide. This guide explains the different sections of the form and helps you to better understand its contents. It also informs you of the limits and deductions that apply.
If you have any questions about completing your tax return, you can always contact your local tax office free of charge. There’s a counter where your questions can be answered. The staff are generally very friendly and willing to help.
Step 1: Download and install VSTax software (for PC/laptop)
VSTax program
The VSTax software is for PC or laptop only, and runs on Windows, Mac and Linux. Unlike other cantons, there is no browser version or mobile app (yet?). There’s just an app for downloading and scanning receipts. Alternatively, you can fill in your tax return on paper, but I advise you to use the VSTax software.
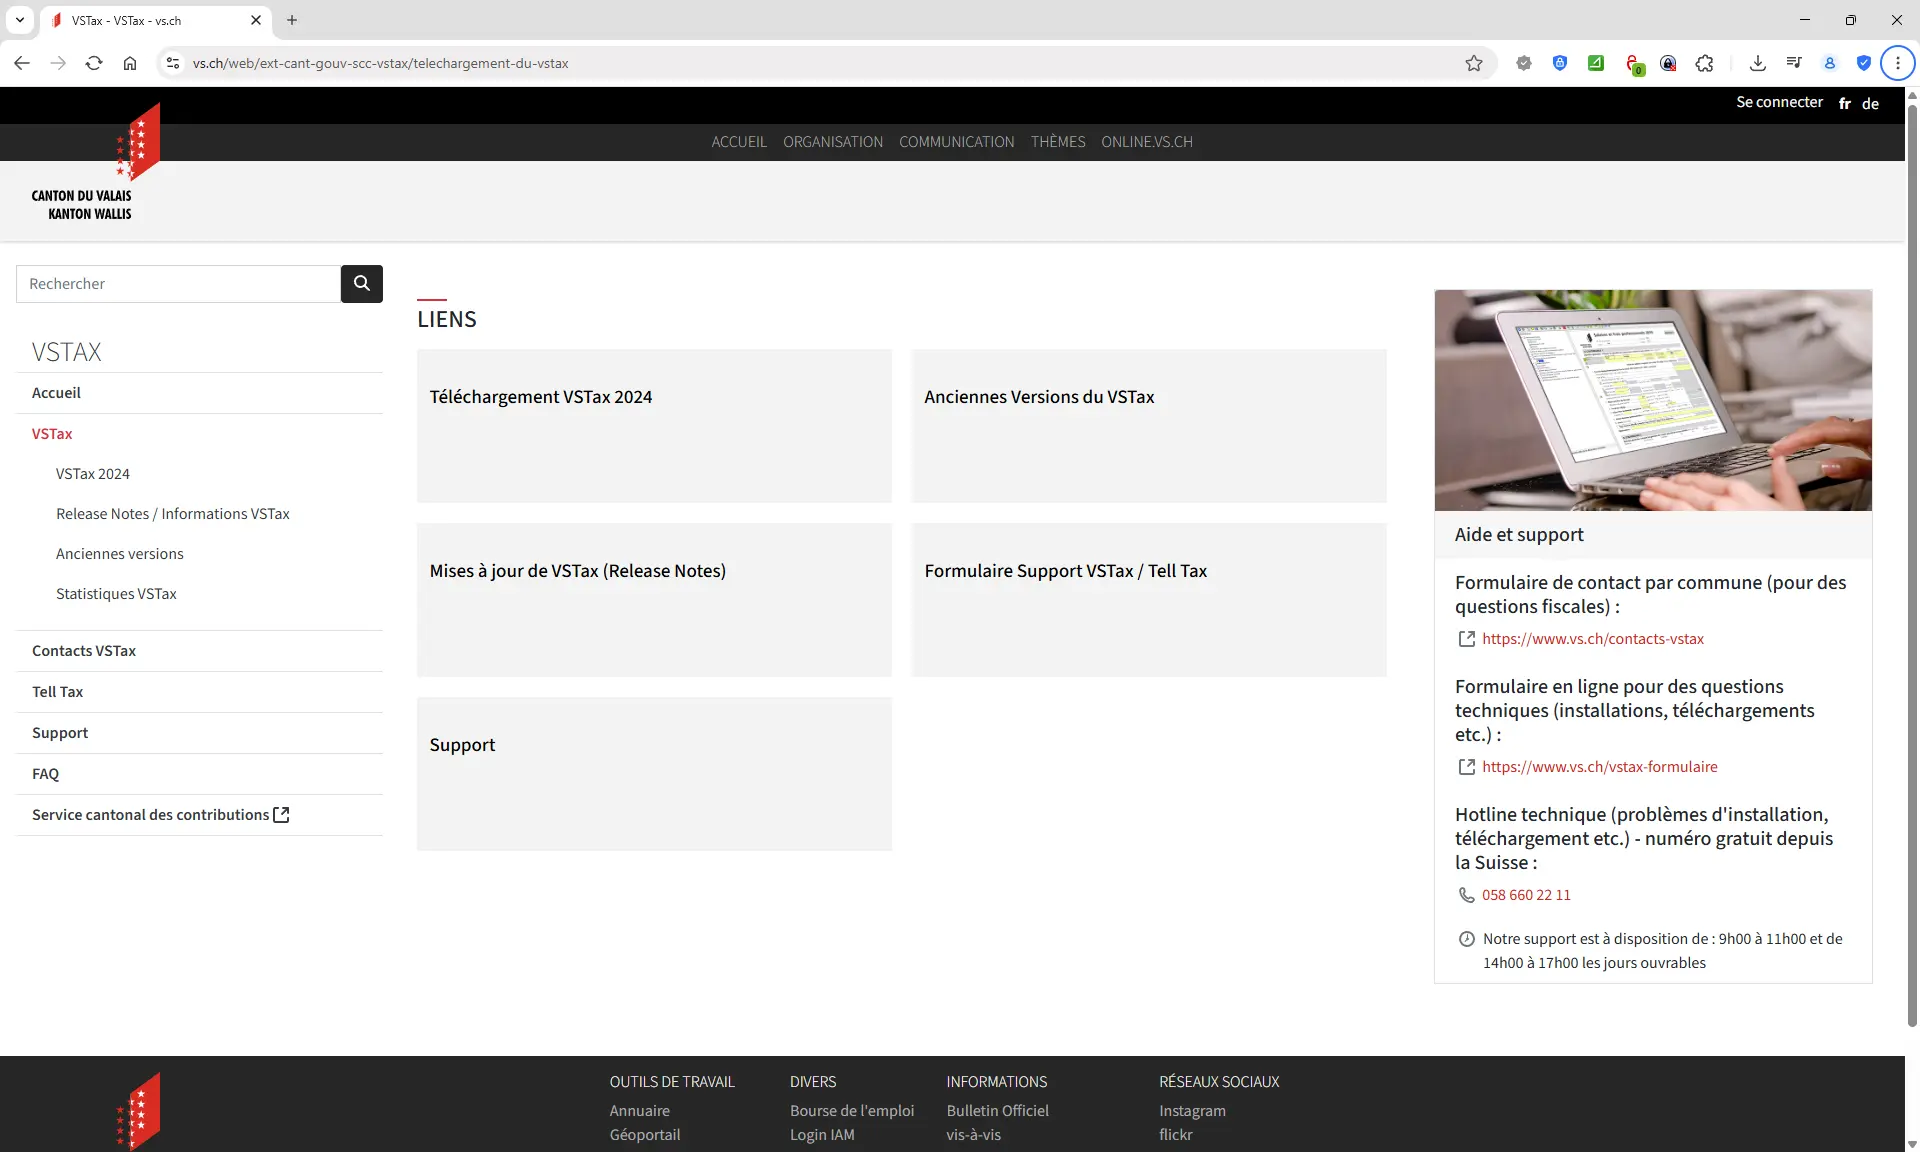
The software can be downloaded from the canton’s VSTax page VSTax software download page
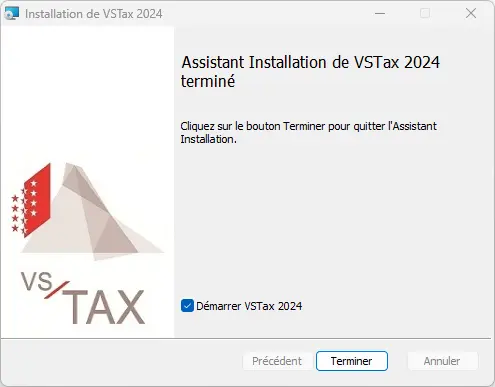
Once the installation file has been downloaded, installation takes just three clicks:
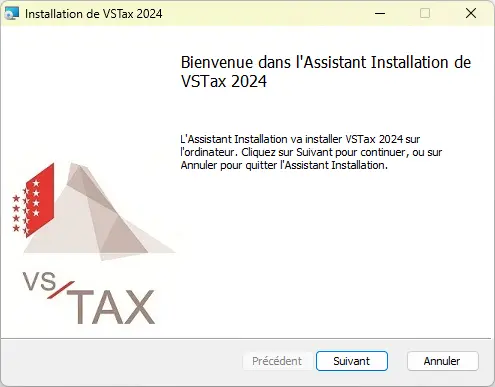

The software requires no special settings and opens automatically after installation:
Tell Tax App
Small addition: there’s a smartphone app dedicated to VSTax, called Tell Tax App. This app allows you to scan paper documents with the smartphone and transfer them directly to the desktop software (unfortunately, it doesn’t do anything else).
Unfortunately, the Tell Tax app has come under increasing criticism in recent years. Based on our experience and reviews on the Apple Store and Google Store, the app isn’t super reliable. My personal attempts to use the app on a daily basis didn’t really work out either. The challenges and technical issues quickly made me give up on the idea.
As an alternative, the use of a classic scanning app proved its worth. With such an app, the necessary documents can be easily saved as PDF files, then filed in a folder on your desktop. Import into the tax software is then a simple matter of drag & drop. This method avoids tedious processes such as code retrieval, complex registrations and possible synchronization problems that can unfortunately occur with the Tell Tax application.
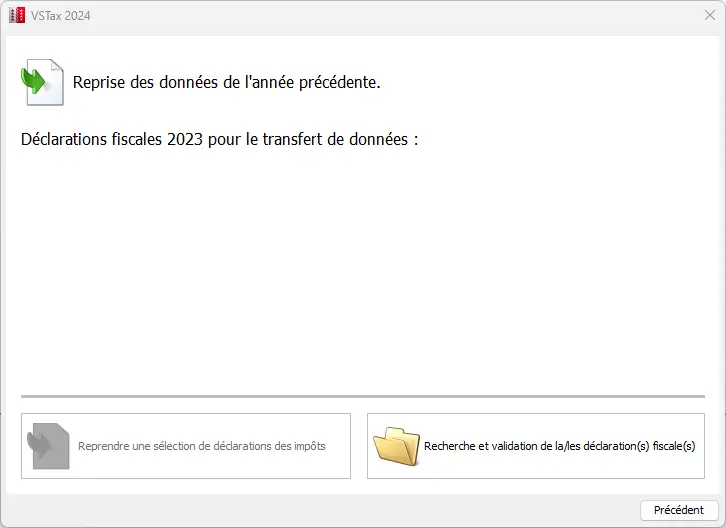
Step 2: Import previous year’s figures
If you already filed an electronic tax return last year, you can import the previous year’s file. This allows you to use last year’s data as a basis, saving you time:

The import process is generally straightforward: just select the relevant file and follow the on-screen instructions. Many of your personal and financial details are then automatically transferred, making it much easier to process your current tax return.
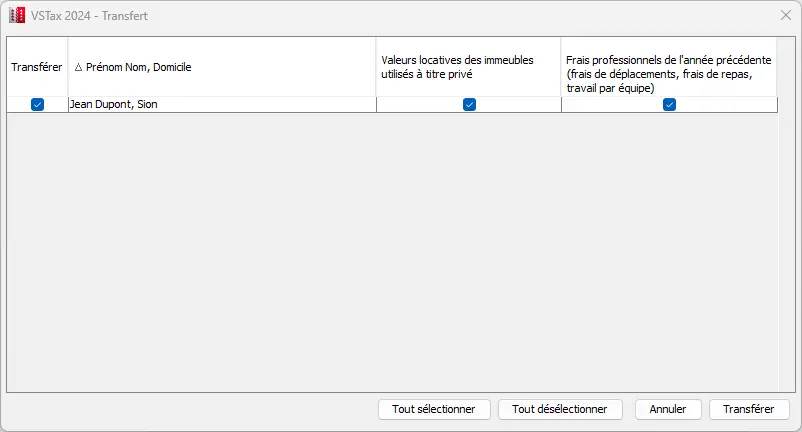
The transferred data is displayed and must be confirmed. By default, all relevant fields are selected, which is particularly useful if your personal situation has not changed.
After import, the basic data, i.e. the “Personal data” and “Occupations” sections, are displayed. It is advisable to check these quickly before starting the actual tax declaration. Many values can be adjusted or corrected manually if necessary.
At this stage, it is particularly important to indicate your occupation and whether you have made any regular pension fund (2nd pillar) contributions. This is the case if your annual salary is at least CHF 22'680 (as at 2025). In case of doubt, you’ll find this information on your salary certificate under point 10.1 (ordinary contributions).
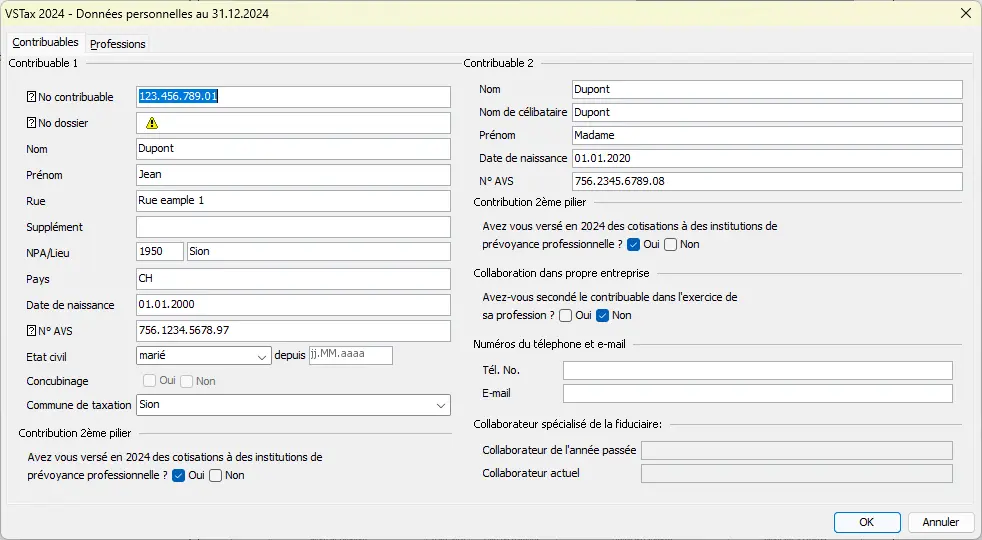
If you’ve just arrived in the canton of Valais and don’t yet have a digital file, or if up to now you’ve worked exclusively with paper documents, this isn’t a problem. In this case, you will be asked to enter all your personal data directly here. The basic data must then be entered manually.
Even if manual data entry takes a little time at first, it’s well worth it. Next year, you won’t have to retype everything, because your data will already be there in digital form.
Step 3: Save
I advise you to save the imported data directly into a new file. The first time, a new file will be created in a suitable folder. Later, you can temporarily save your tax return with a single click. It is advisable to save regularly, for example after entering each page or filling in a form.
Step 4: “Form navigation” interface
Before filling in your tax return, it’s worth taking a look at the structure of the software. VSTax is divided into three main parts:
1/ Top left (navigation area): here you’ll find the four-page tax return (bases, income, deductions, wealth), as before on paper. Attached forms are also visible, with the active form highlighted. You can click on a form and modify it at any time, but I advise you to navigate through the 4 main pages of the tax return.

2/ Bottom left: a field for adding electronic supporting documents (more on this later in the tutorial).
3/ On the right (form area): this is where the active form or corresponding page of the tax return appears, to be filled in with the requested info.

In the canton of Valais, the tax return is divided into a main return and supplementary forms. At first, navigation may seem a little awkward, but once you understand the principle, everything becomes clear. The yellow fields must be filled in (most of the time, this is optional), while the grey fields are calculated by the software or are already filled in by the tax authorities.
Navigation is from the tax return to the various forms, then back to the tax return, depending on where you are in the filling process. This will be explained more clearly in the next step.
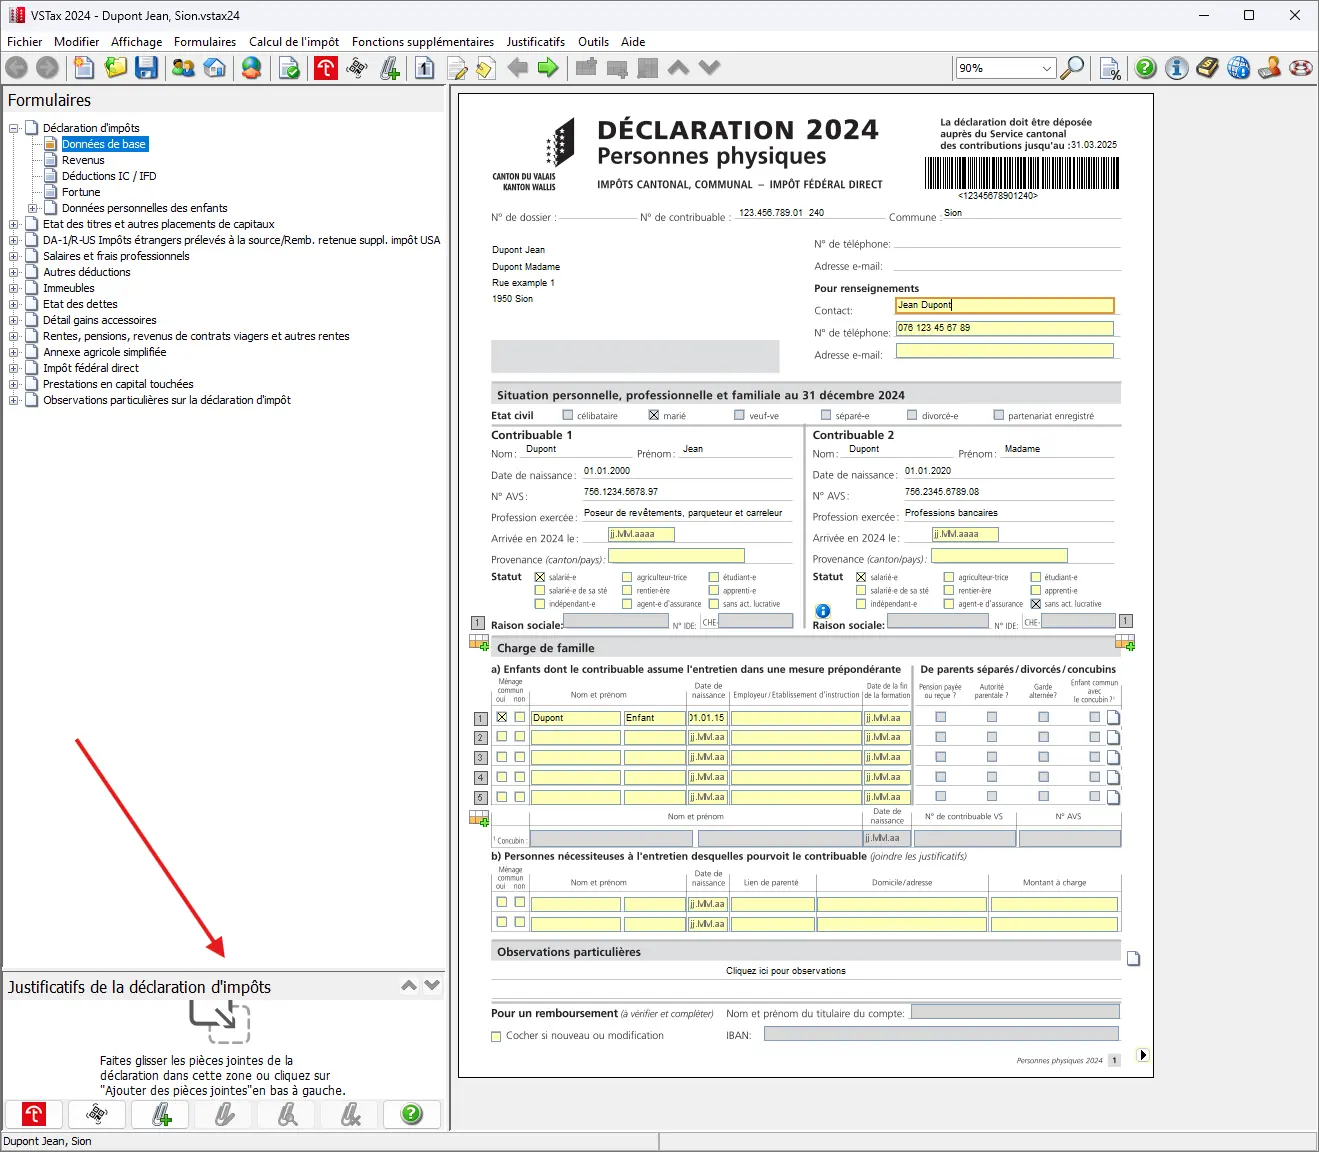
Step 5 - Page 1: Fill in the basic information
Here you basically have to fill in the basic information about yourself, your spouse and your children. If last year’s import was successful, a brief check is all that’s required. Some fields are fixed and come from the basic data of the previous step.
On this page, you don’t need to enter tax figures (yet), just general info about you and your family. In this example, I’m assuming that both spouses work and have a child living with them.
Whether you’re married or not, the pages and some forms of the tax return are designed so that both spouses are listed side by side. This procedure corresponds to the classic layout of the old paper tax return and has remained unchanged to this day.
For children, click on the form icon to access the “Children’s details” page, where you can enter additional information. At least one question per child must be answered; these are highlighted in the software by a red bar.

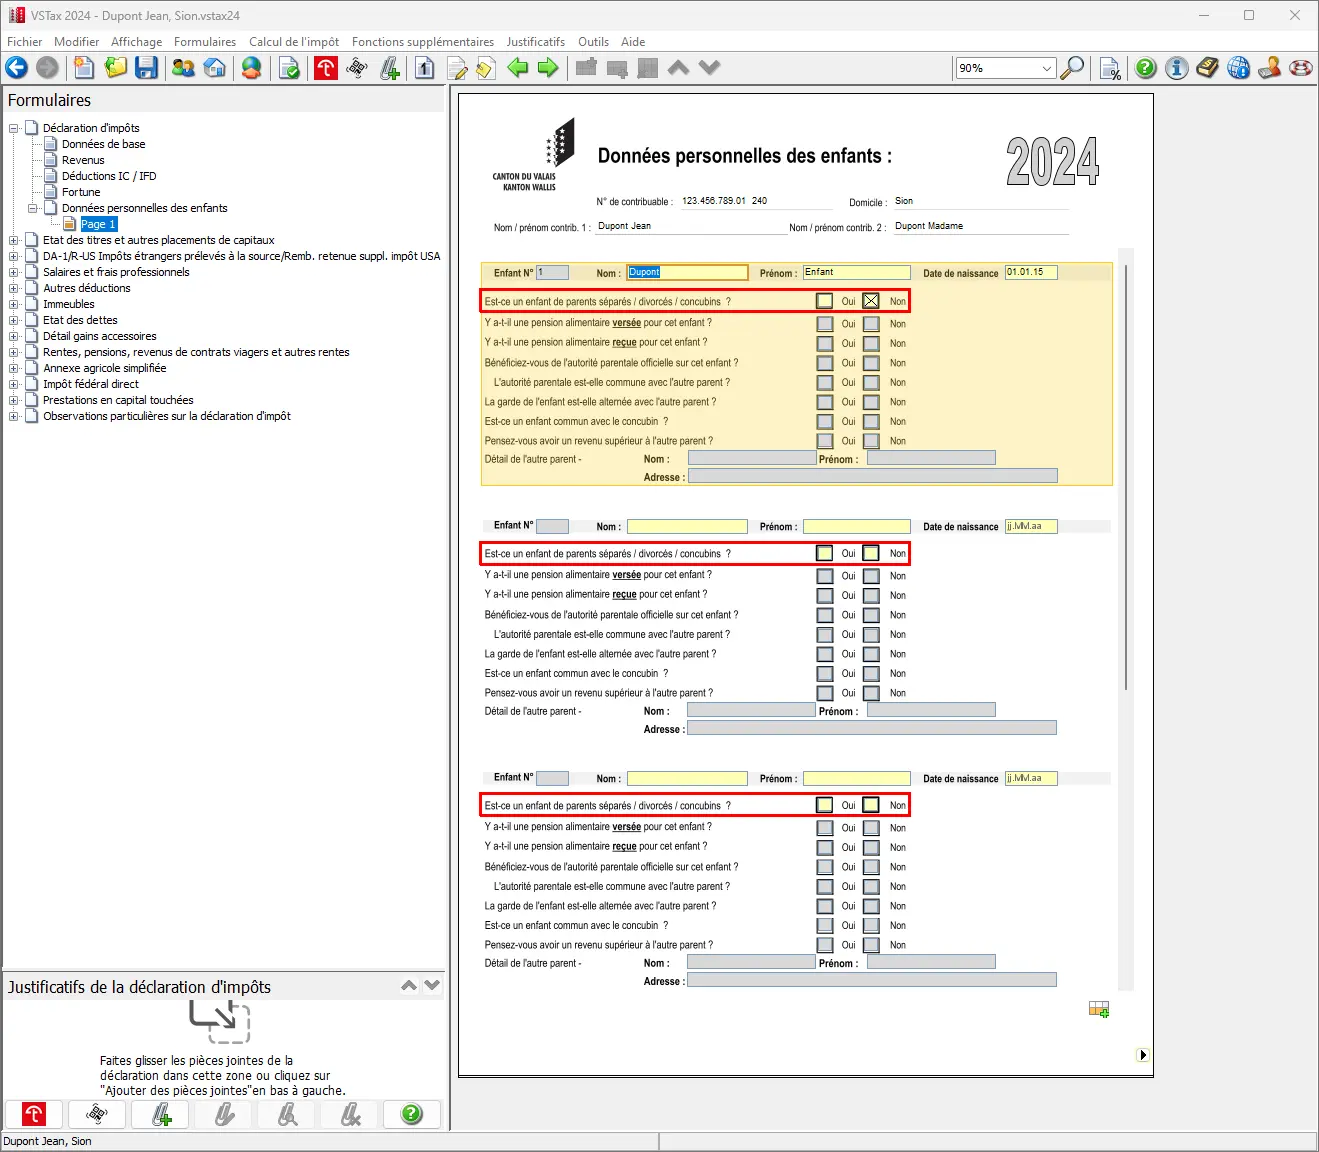
In our example, this is a joint child who lives with his parents, which means that there is no maintenance obligation. Once you’ve entered the correct information for each child, you can click on the arrow symbol in the bottom right-hand corner to return to the main page. This maintains the navigation order when filling in the information.

Always use the navigation (bottom right arrow) when you’ve finished a form or page. It allows you to return to where you opened the form.
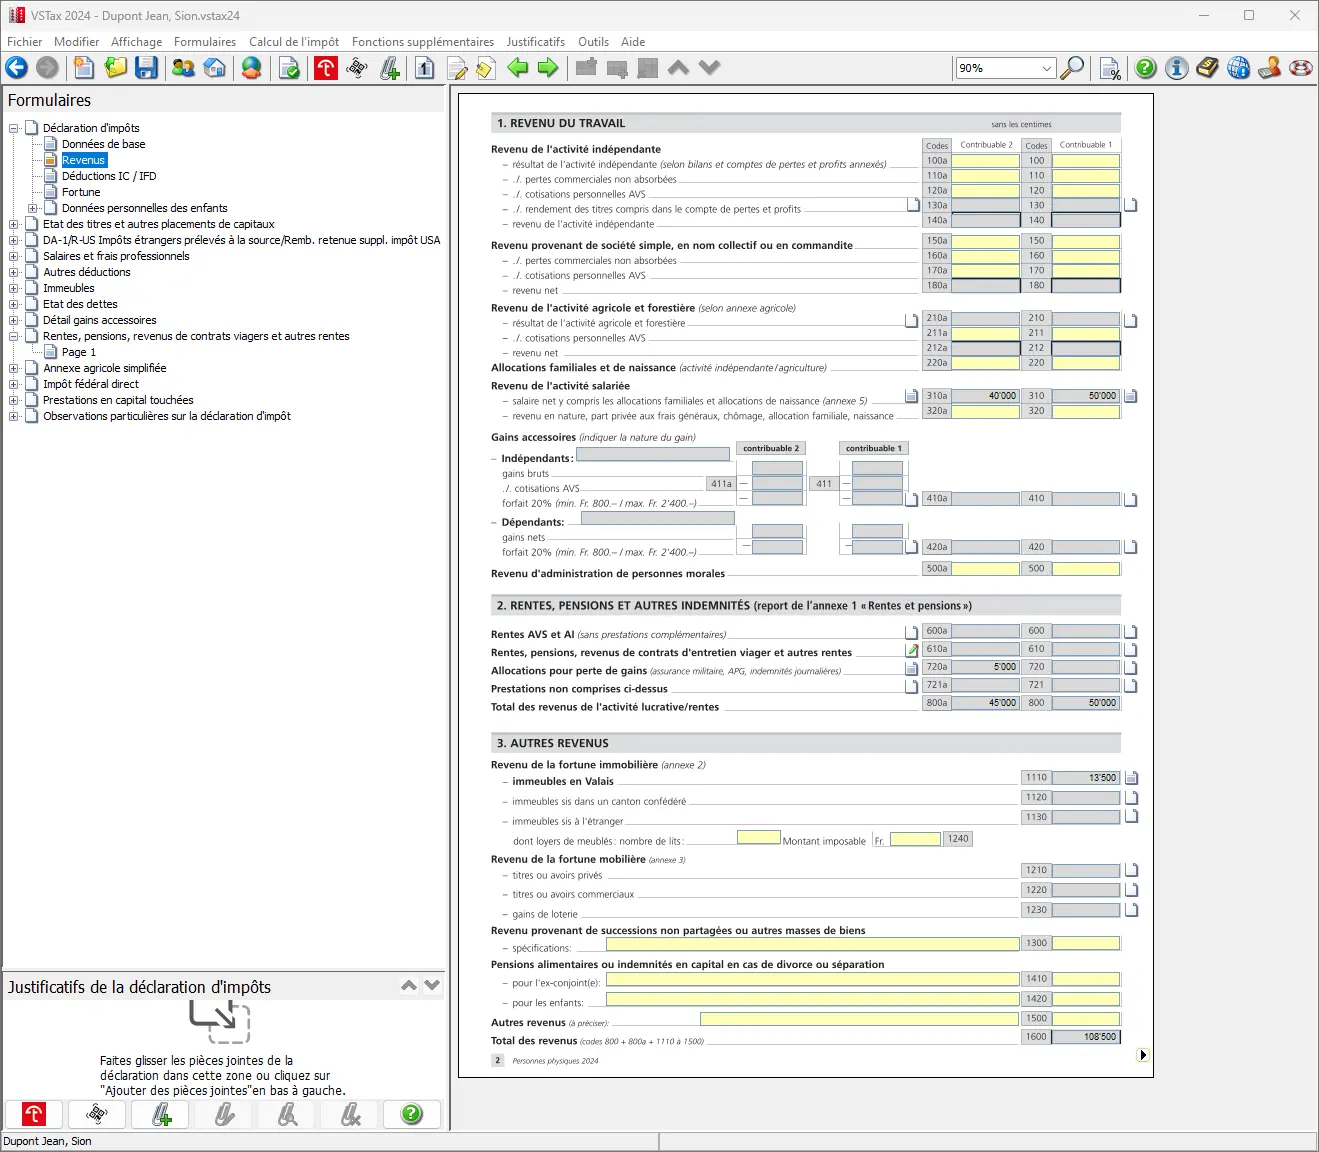
Step 6 - Page 2: Income (professional income)
Once you’ve filled in the basic information, I recommend that you save it temporarily. This will take you to the income page. The navigation at bottom right takes you to page 2.
Here you declare your income. At the top, you can toggle between your data and that of your spouse.
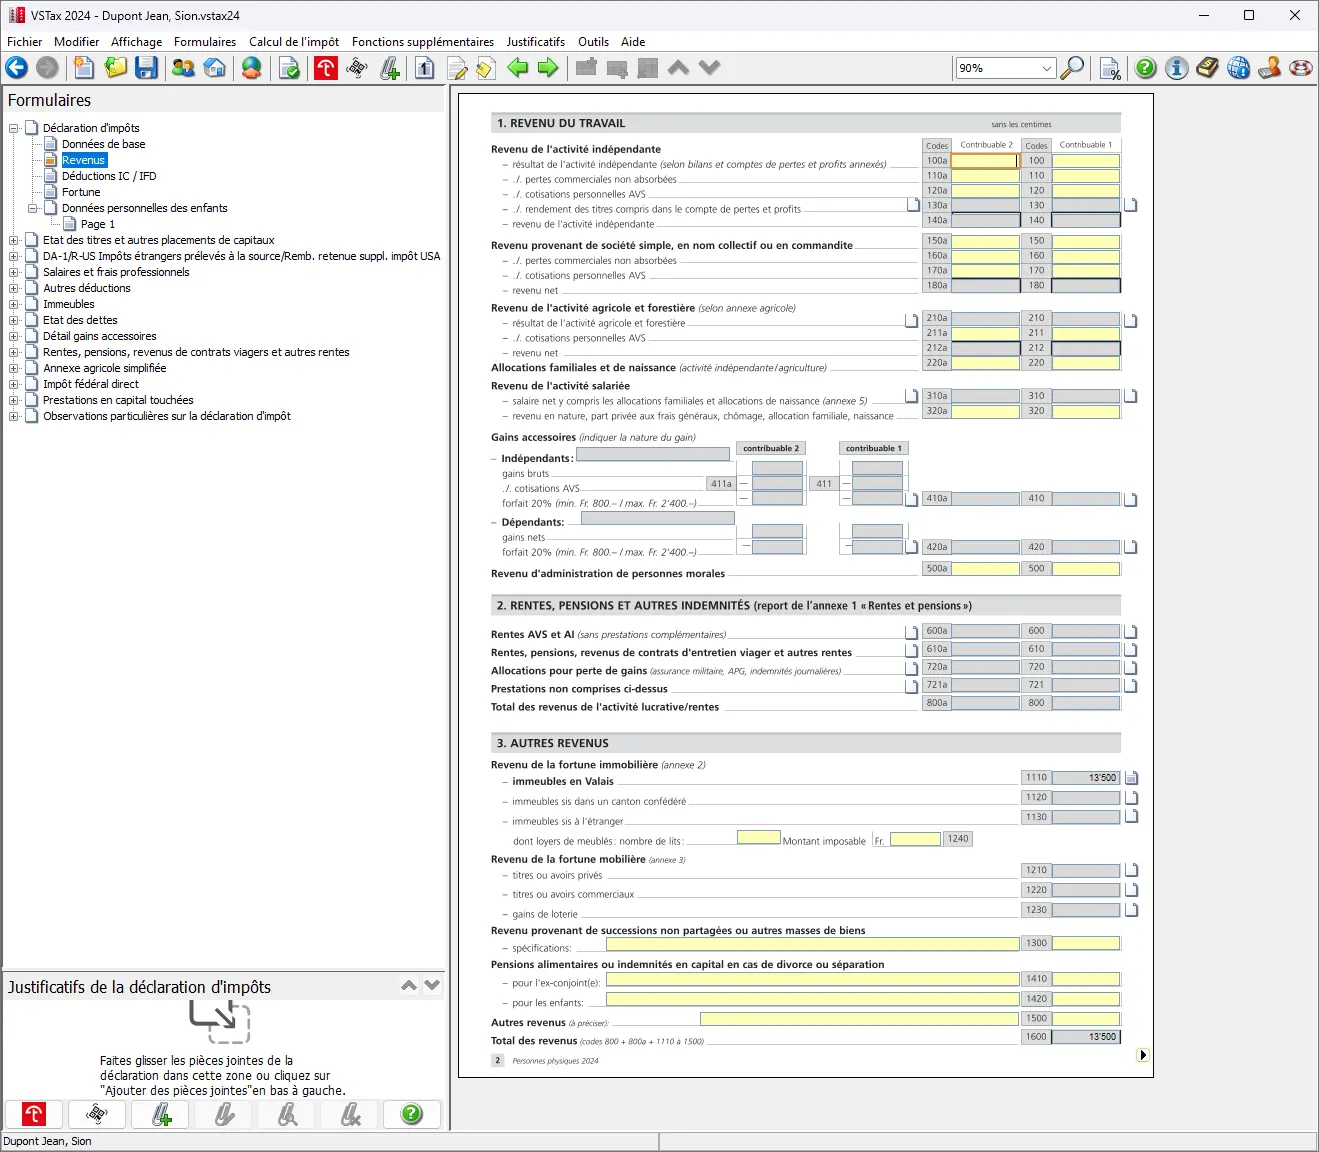
For salaried workers, income from salaried activity is taken into account, while self-employed workers must select income from self-employed activity.
Some of the previous year’s data are repeated (as you can see in the screenshot below) and are only visible when you click on the corresponding forms. For each form, select the corresponding icon, once for you and once for your spouse. Both clicks lead to the same form.

Here is also an example of data taken from the previous year.
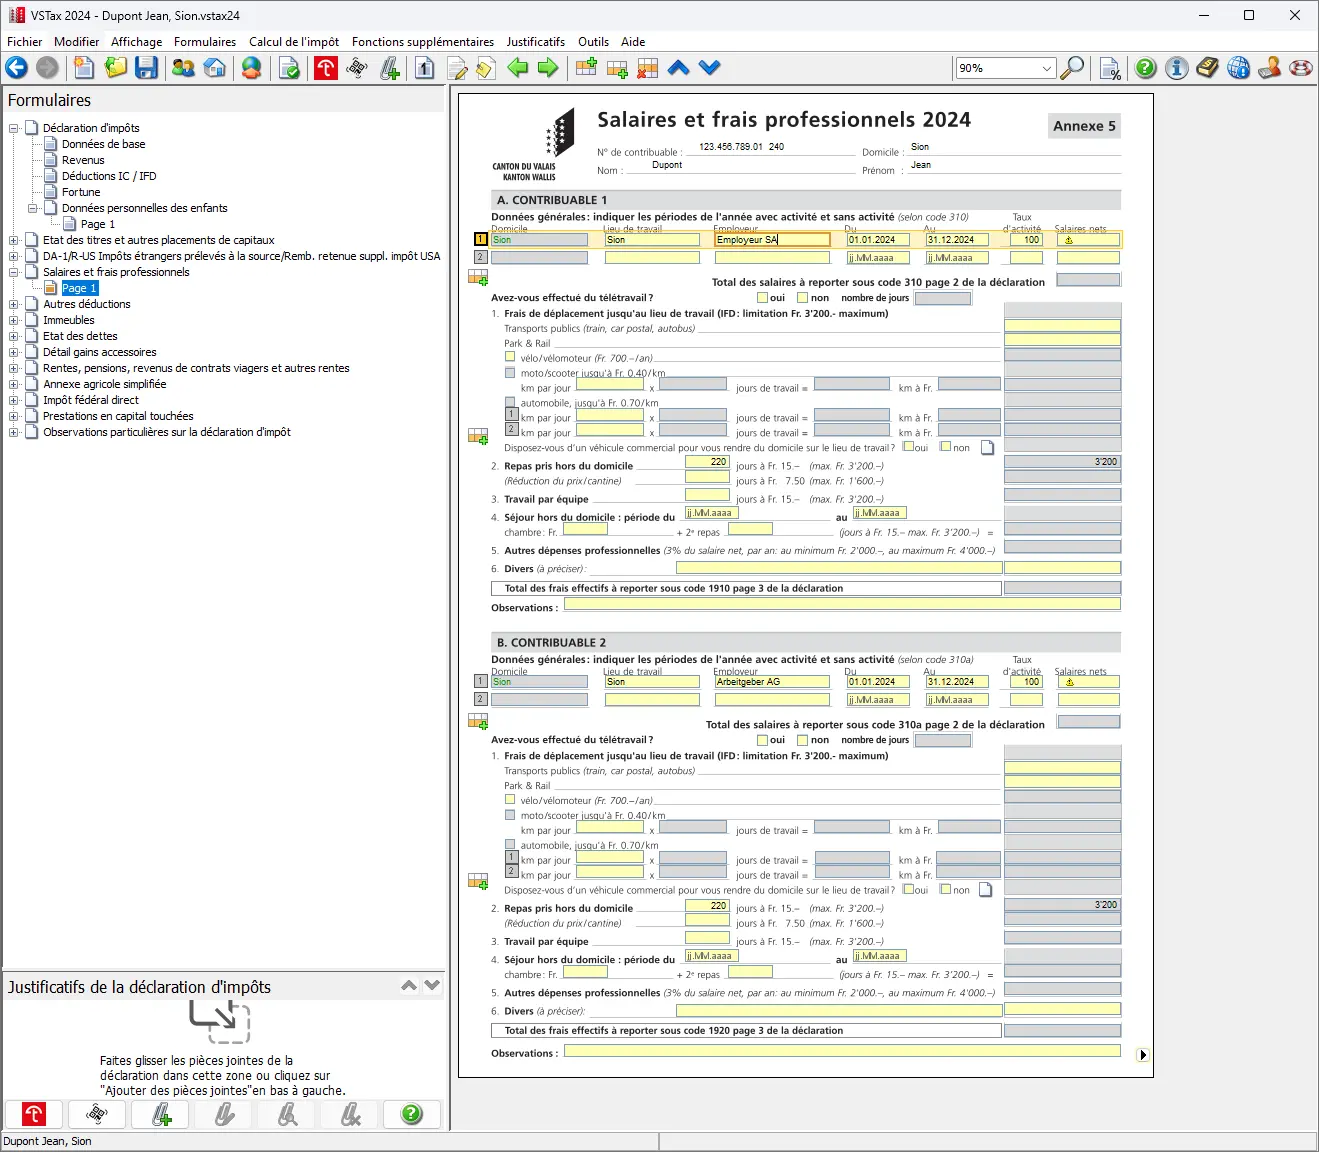
As an employee, you’ll find this information on your salary certificate. Fill in the details of your job and your net salary (under number 11 on the salary certificate) as shown on the salary certificate. This already covers all AHV and pension fund deductions, as well as child allowances.
For employees, the following information is usually already taken from the previous year and should be checked:
- Employer and place of work
- Length of employment (by default, all year)
- Rate of employment
The following information must be added manually:
- Net salary
- Number of days worked remotely (must be corrected manually, even for out-of-town lunch days or travel expenses, but at least a nice reminder is displayed)

- Outside meals: you can enter your meal expenses here. Standard flat rates apply. CHF 3'200/year if you cover all costs, CHF 1'600/year if your employer covers part of the costs (e.g. in a company canteen) or CHF 0 if your employer covers all costs. This information is also on your payslip.
- Transport costs (these are not carried over from the previous year and must be separated into public transport, bike/scooter, motorcycle or car). You can deduct the cost of transport to and from work, but only if you pay for it yourself. If your employer pays them, no deduction is possible. The conditions under which the car is deductible can be found in the guidelines issued by the canton of Valais (available under “Help with tax returns”).
- Weekly stay: if you are on a weekly stay, you can still claim accommodation and catering (dinner) expenses.
- Other business expenses (if applicable)
- Ask if a car is provided by your employer (this question must be answered every year).
You can also claim other expenses, for example if you have bought special work clothes or tools, used a private office or paid for memberships. As a general rule, a flat-rate deduction of 3% is allowed, so think carefully if your expenses exceed this value. If you declare actual expenses, you must be able to justify them with supporting documents.
If you have several jobs with different conditions, you must calculate deductions on a pro rata basis.
The guide gives examples for many cases. Alternatively, you can ask your local tax office for help.
In the example, net salary and public transport costs are taken into account; adjustments can be made if necessary. Spouse’s meal expenses outside the home are taken from the previous year. If all the information is correct, you can exit the form by clicking on the bottom right-hand corner.

Completed form for business expenses with transportation costs, meals away from home and teleworking days
Step 7: Pensions and other benefits
In general, as with the salary certificate, this shouldn’t be a problem, as all you need to do is enter the final values.
If you receive pensions from the AHV, IV or compensation for loss of earnings, these must be entered in a special section of the tax return. In this case too, you will be redirected to a form where you can enter the amounts concerned.
In general, it’s easy to enter these amounts, a bit like filling in a salary certificate. All you have to do is enter the final amounts. In the example below, the spouse received compensation for loss of earnings for two months.
Simply enter this total amount in the field provided.
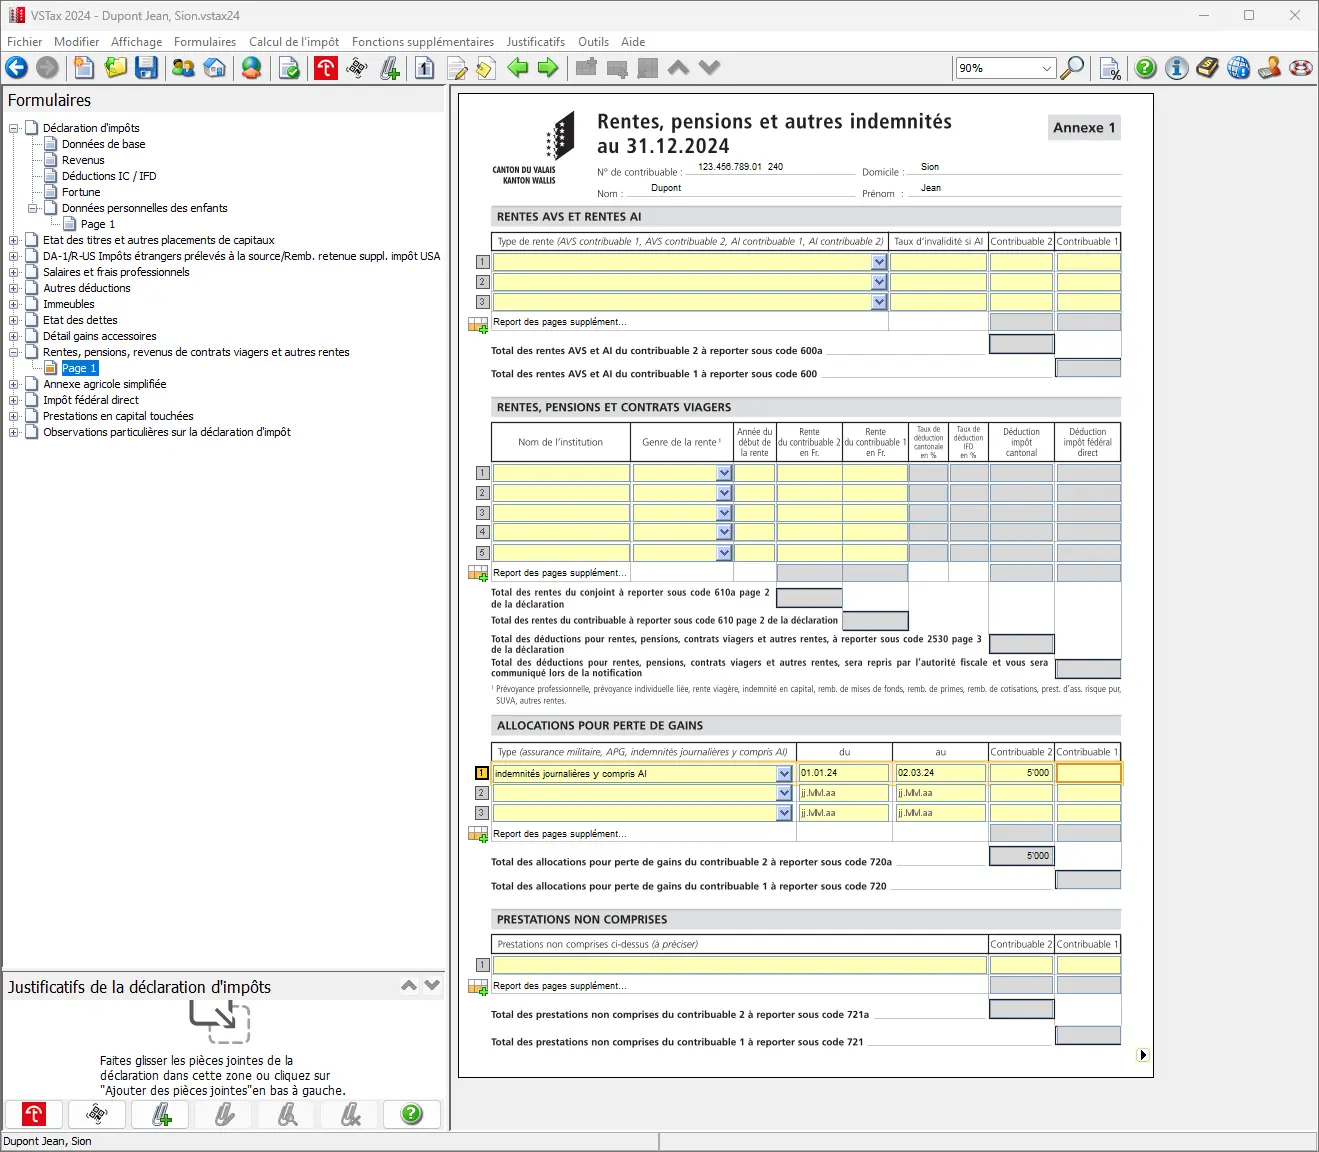
To finish filling in the important information, click on the arrow at the bottom of the screen. This will automatically take you to page 2 of the tax return.
The corresponding form should now be fully completed. The fields for the two professional incomes as well as for additional annuities, pensions and similar benefits are filled in accordingly.
Where applicable, information on property income has also been taken over — this is done by the VSTax software, which has automatically taken over the previous year’s values. It should now look like this:
Next step
If you’re salaried like me, these first steps were pretty straightforward.
In part 2 of our VSTax tutorial, we’ll talk about the following sections:
- Other income
- Income from movable property
- List of securities / assets
- Supplementary form DA-1/R-US (stocks and securities)
And if I’ve missed any tax-saving opportunities in the screenshots above (or if you have any questions), let me know in the comments section below.