Some days or weeks after having enjoyed a nice party for New Year’s Eve, the Geneva canton’s taxman will send you the information necessary to start GeTax, the tool used to declare taxes for the previous year… bummer…
You could try to extend the deadline (which is 31.03), but this won’t change the fact that you’ve to file your tax return anyway. Moreover, in the canton of Geneva, such a tax return extension will cost you money: 20 CHF up to the end of June, 40 CHF to the end of August, and 60 CHF for after August! Thanks, but no thanks.
Step 1: Downloading GeTax
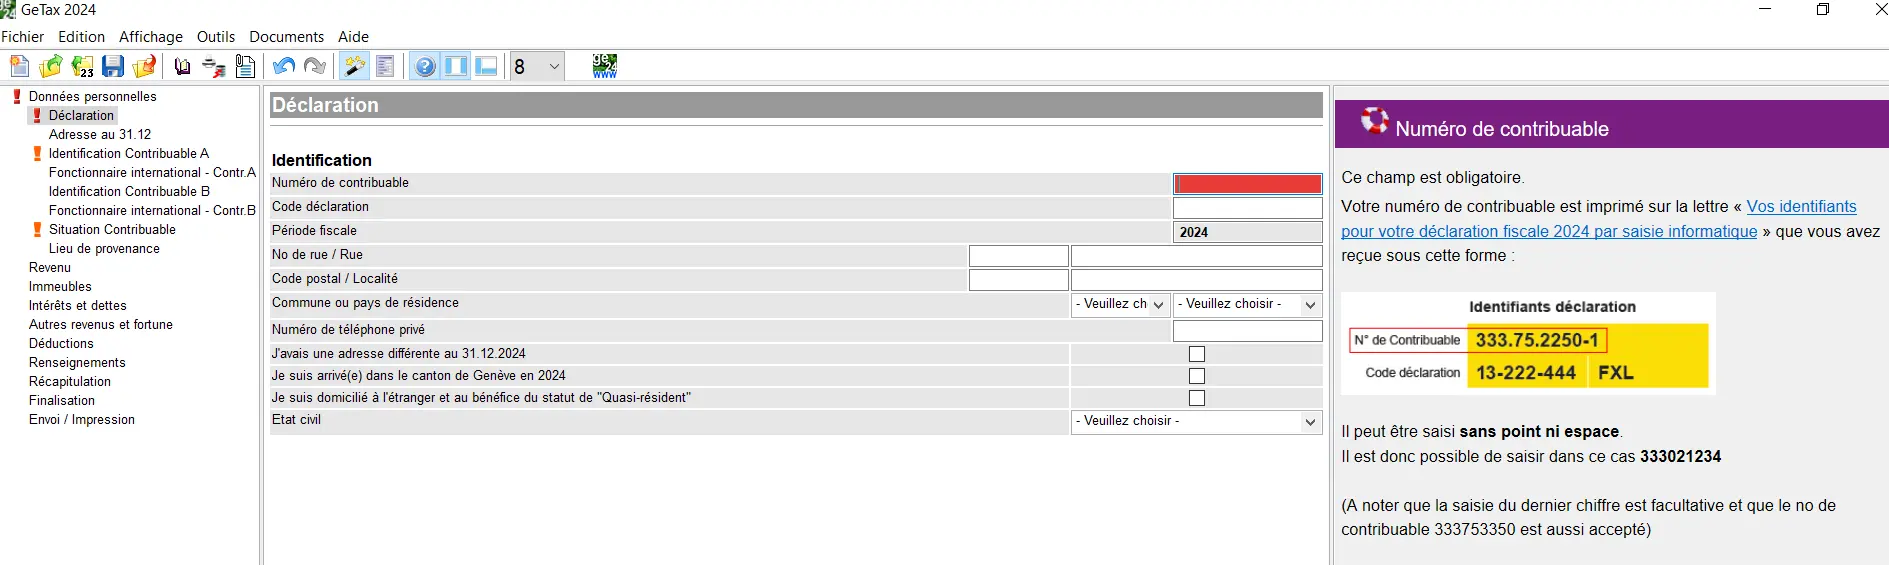
In case you have an account with “e-démarches fiscales”, this document can be found in your inbox, or should you not have an account, it will be physically sent to you. You will find your individual tax number (aka “Numéro de Contribuable”) and the “Code de déclaration” on that document.
Then, you’ll have to download GeTax for the respective tax year onto your computer. The download will self extract creating a folder for the program itself, and your data you will fill in.
The tax declaration tool is quite straightforward and provides some explanation. Should you need more guidance you can always contact the “Administration fiscale” via phone or visit them during opening hours, they are quite helpful by experience.
Important to know is that you have to upload supporting documents — in the form of PDF — only at the very end of the process, so don’t worry should you have the feeling you might have missed something working through the procedure.
Step 2: Getting started with GeTax
GeTax language is French (official language of the canton of Geneva), and there are no others available.
If you have used GeTax before, you can import static data via the menu “Fichier” > “Importer”.
In case you are a first time user, then it is: “Fichier” > “Nouveau”.
In both cases you have to provide your “Numéro de contributable” and your “Code de déclaration”, both available as explained above. Should you not have that information, GeTax will not let you proceed further.
Hint: in case you would like to play with the tool but do not have your individual access data, you can use the sample codes provided by GeTax:

Two versions of GeTax: “Magic wand” or “Form”
You have the choice between two versions of the tool:
- The more guided version of the tool, with its “Magic wand” symbol
- The old school “Form”, with its according symbol at the top
The latter one provides, as the name implies, a view of the declaration as it would be in print form, whereas the magic wand provides you in some cases with more information as what the program expects as input.
Below are screenshots first of the “Magic wand”, and second of the “Form” version:
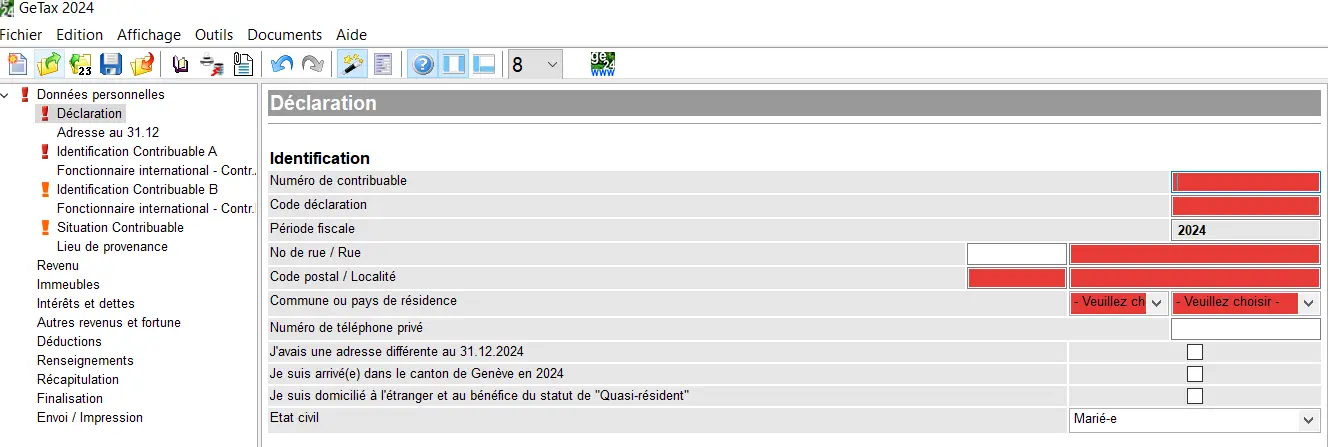
Both versions have in common that they show missing items filled in red in the declaration section, and on the left hand side with a red exclamation mark or with a red line.
Also, note that input of figures has to be done without decimal places, so round them up or down accordingly. All revenues, expenses as well as holdings have to be declared in Swiss francs (obviously), and exchange rates can be found on the Geneva canton website.
Save, save, save!
It is very important that you press “Save” in case you are happy with what you’ve filled in. Should you exit the program without saving, you will lose data.
The program will (should!) prompt you with a hint if you didn’t save your changed data. That applies for all data you will input, static, kids related, revenues, savings accounts, securities positions, uploads, etc. But you never know, so you better save, as you don’t wanna do your tax return twice!
Step 3: Basic data and kids information kids
In the rest of the guide, I will use the “Magic wand” version going forward. Also, I will in most cases not show you the comment sections on the right hand side in order to make the screenshots better readable.
Let’s assume you start fresh with no data to be imported, and are married with two children.
Below would be your first screen:
Taxpayer identification screen in GeTax with entry of taxpayer number, declaration code, and personal data
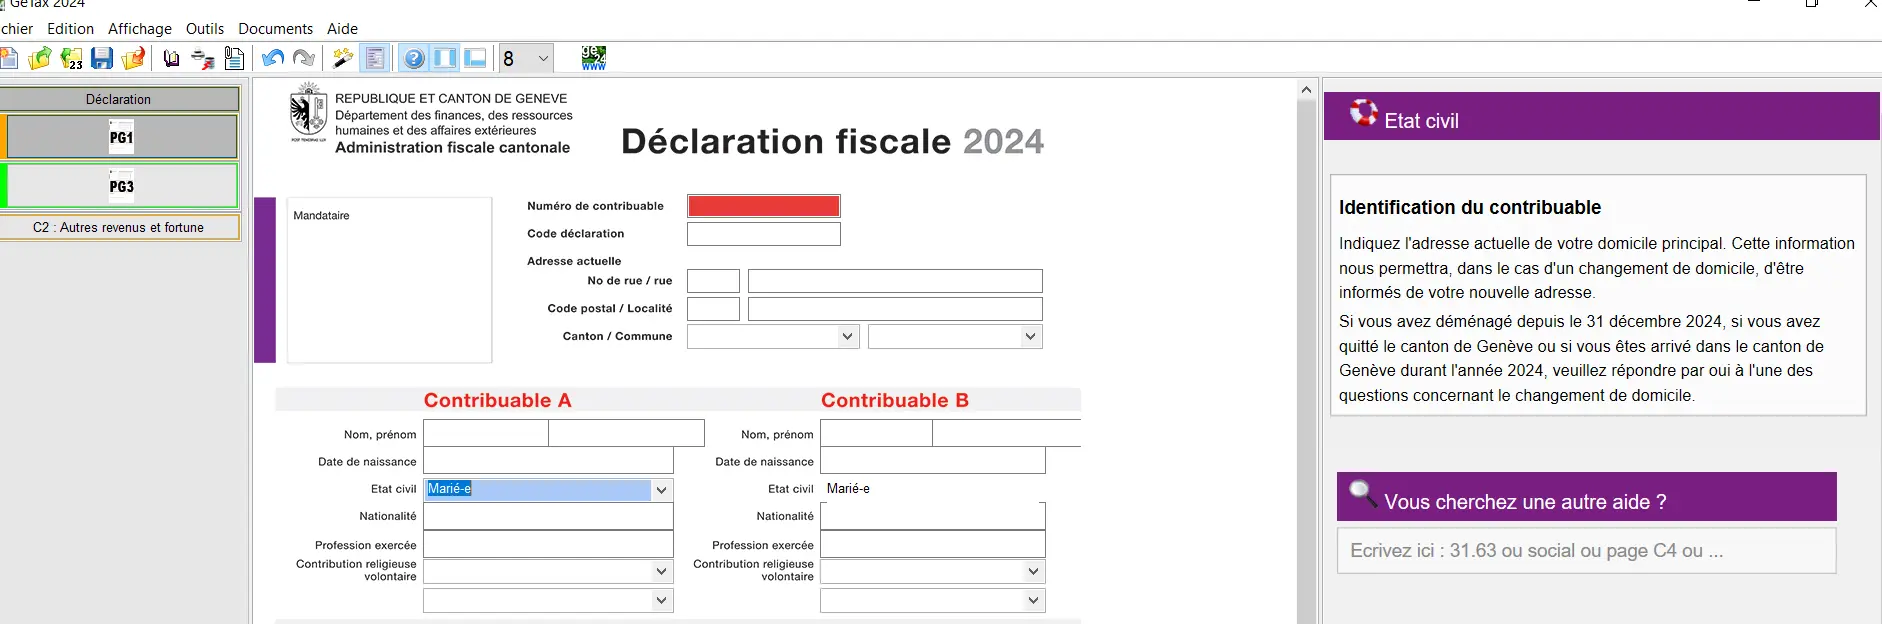
The program expects all the red sections to be filled. As your legal status is set to married, it will then triggers “Contributable A” and “Contributable B” as next pages, with “Contribuable A” as sample below:
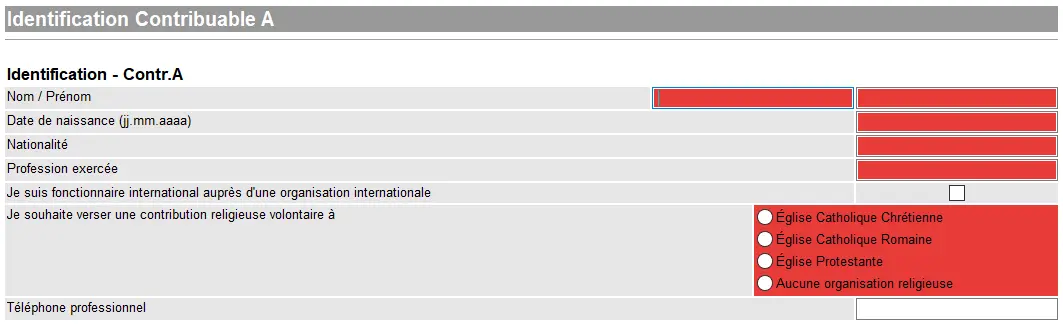
Identification of taxpayer A in GeTax with entry of personal data, occupation, and choice of religious contribution
Next, the taxman will ask what you pay in terms of rent, should you rent your apartment or house.
After that, you have to click on the field for kids or other persons you take care of financially. Only if you click on these fields will the respective screens where you have to fill in more information appear.
The fields are rather self explanatory, but be careful if for instance the child allocation does not appear on your yearly salary statement, then that income does not belong here.
GeTax provides you with information for most of the fields. So for instance when you place the cursor in the field “Frais de garde effectifs”, the information on the right hand side of the below screen will appear, it’s quite handy:
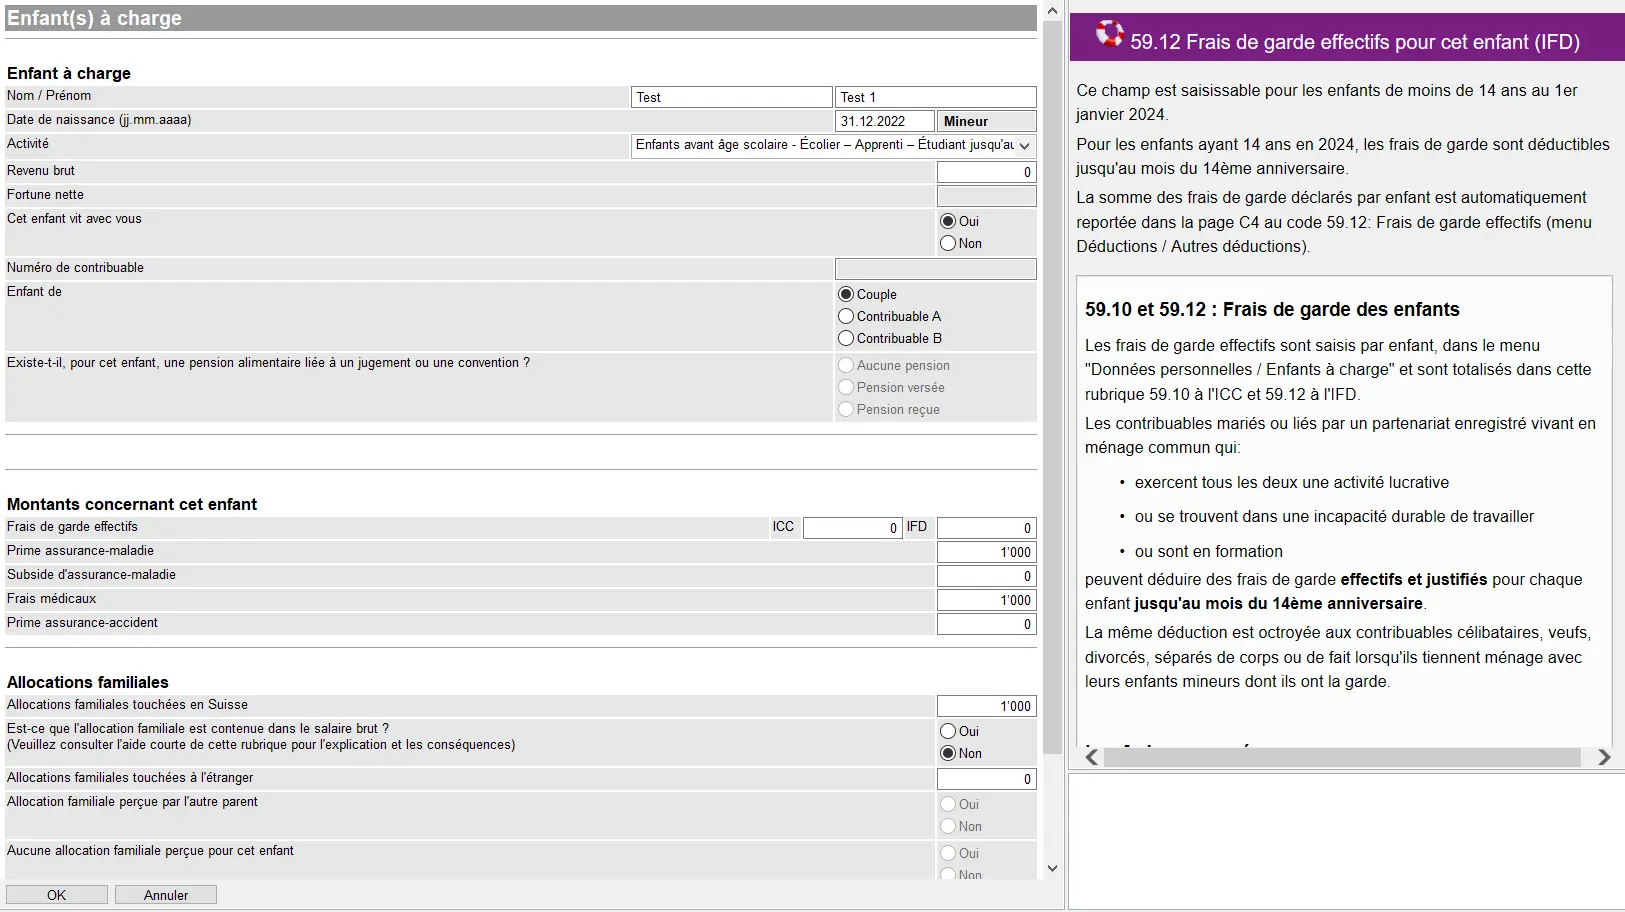
Declaration of a dependent child in GeTax with entry of personal information, actual childcare costs, and family allowances
Once you are happy with what you see press “OK” and the below screen will appear:
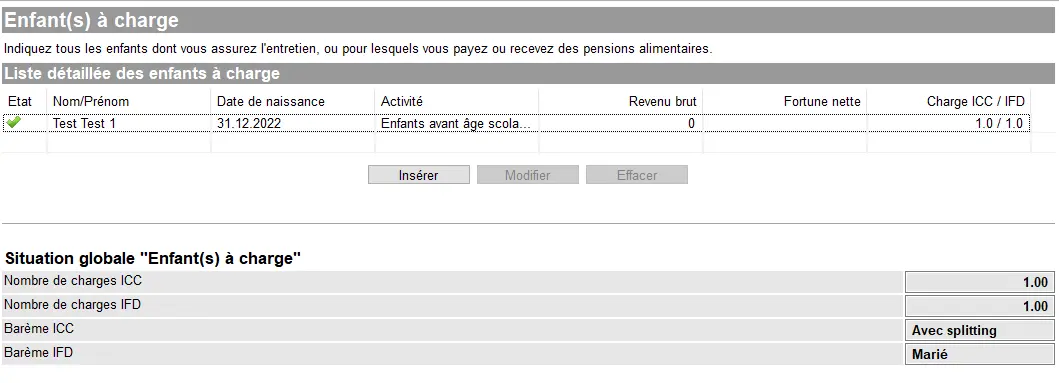
List of dependent children in GeTax with summary of ICC and IFD expenses and family distribution parameters
And you can include data for the second child via the button “Insérer”.
Step 4: Revenues
Below you will find the screen concerning your revenue situation. In case both parties work, you will have to be clear who is “Contributable A” and who is “Contributable B” and also stick with that for the rest of the declaration (for instance with your wealth infos, etc.)
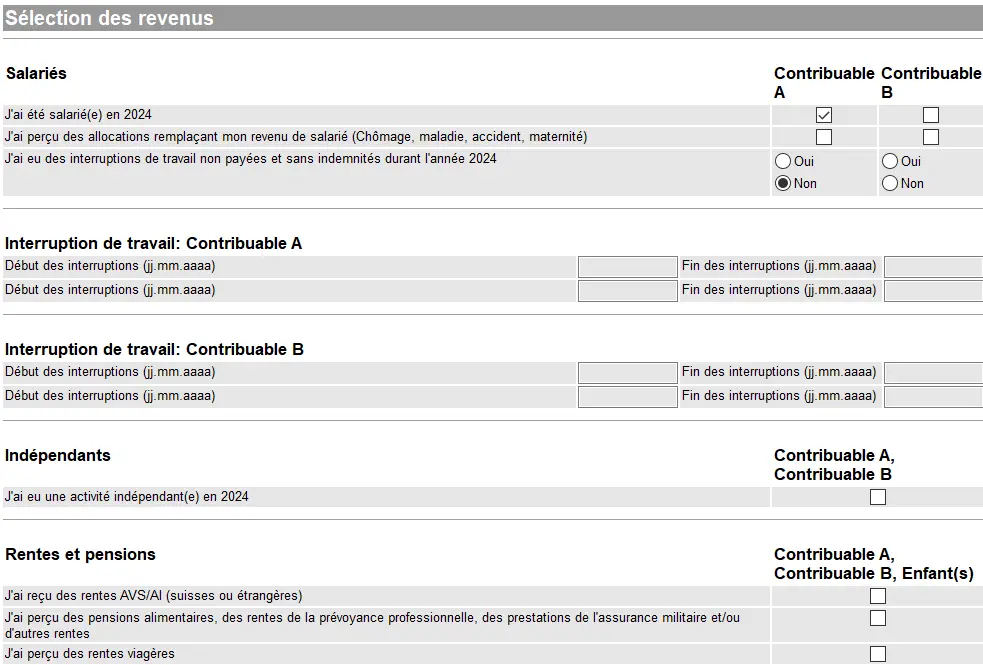
Selecting income in GeTax with declaration of salaried activity, work interruptions, self-employment, and pensions received
Let’s assume only “Contributable A” received a salary in the tax year in question, with no interruptions of work as already indicated in the sheet above.
Should you not have worked for a certain time, you would have to provide that information as well.
Working as independent would also have to be declared, the same applies to pensions, etc.
Filling in the below fields is rather straight forward, as most yearly income statements you receive from your employer reference the information. For instance, your net salary on your wage statement has a reference of 1, that goes into the field “Salaire”, etc.
If you have bought into your pension fund besides regular payments, that information might not be found on your salary statement but you get that via your pension fund separately and belongs into field 10.2 under “Rachat(s)”.
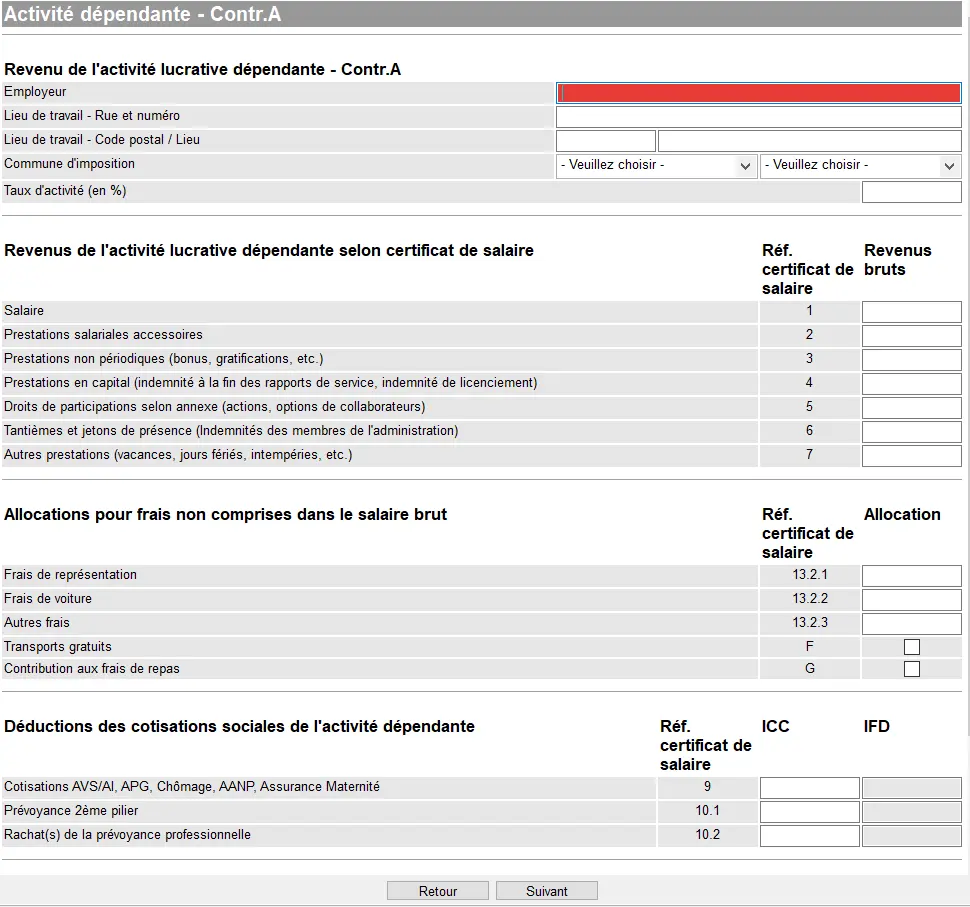
Finally, if you have worked for more than one employer, you can add the next one at the end of the screen as shown below:
Once you are done with your salary, GeTax moves on to the 3rd pillar:

Deductions is the upcoming topic after you’ve pressed “Suivant” on the above screen. Only in case you have included revenues under “Salaire” will GeTax let you continue with data here. I have pre-filled “Frais forfaitaire” and left the cursor in the field for “Frais de déplacements”, as I wanted to show you how the program provides you with examples of what you can claim here:
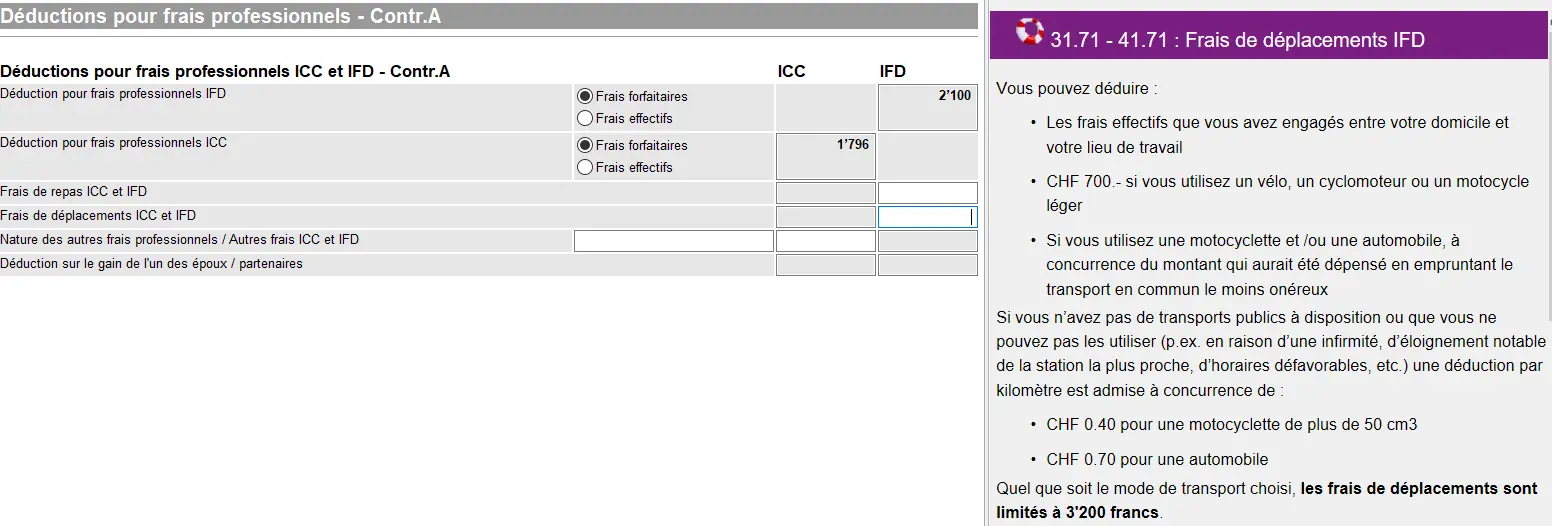
Deductions for business expenses in GeTax with a choice between flat-rate or actual expenses and assistance with IFD travel expenses
As I did not click on self employed revenues for “Contribuable A”, nor did I add a “Salaire” for “Contributable B”, GeTax expects no input here.
Next step
If you’re salaried like me, these first steps were easy enough.
In part 2 of our GeTax tutorial, we’ll talk about the following sections:
- Bank accounts
- Status of securities, including how to declare our famous VT ETF
- E-tax statement
And if I’ve missed a tax-saving trick in the screenshots above (or if you have any questions), let me know in the comments section below.